Practice assessment APP
We are working in localizing this solution to english, stay tuned for more details!
Introduction
The practice evaluation app is designed to easily evaluate any practice session where a teacher needs to supervise a student's work (laboratories, workshops, consultations...) using different flavors of rubrics. The evaluation is carried out through rubrics, and the app is optimized for use on mobile devices.
Need more information? Want a demo?
Send us an email!, and we will get in touch with you schedule a demo.
Access to the application
To include the evaluation practices application in their course, teachers must search for the tool through the course's books and tools menu. Once the tool is located in the list, they should click on the (+) sign to add it to the course.
The tool is displayed like any other content in the course, allowing the title, description, and visibility to be changed.
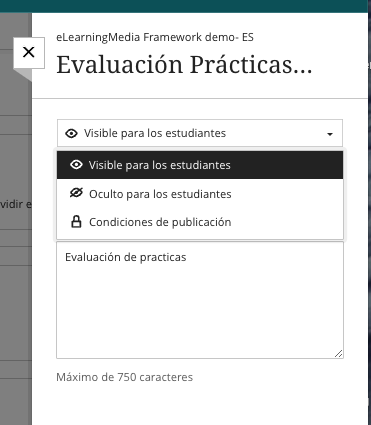
Once deployed in the course, both teachers and students access it through the same link, but it's important to note that the tool must be visible for students to access it.
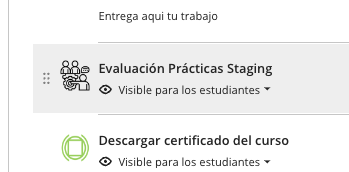
Teacher workflow
When accessing the tool as a teacher, the following screen is presented with access to rubrics, sessions, and analytics.

Assessment Rubric
The first step in using the application involves creating rubrics that will later be associated with practice sessions. Access is via the "Assessment rubrics" link.
Rubric overview
This section allows managing rubrics (Create, copy, share, delete...). The screen shows all the rubrics the teacher has access to.
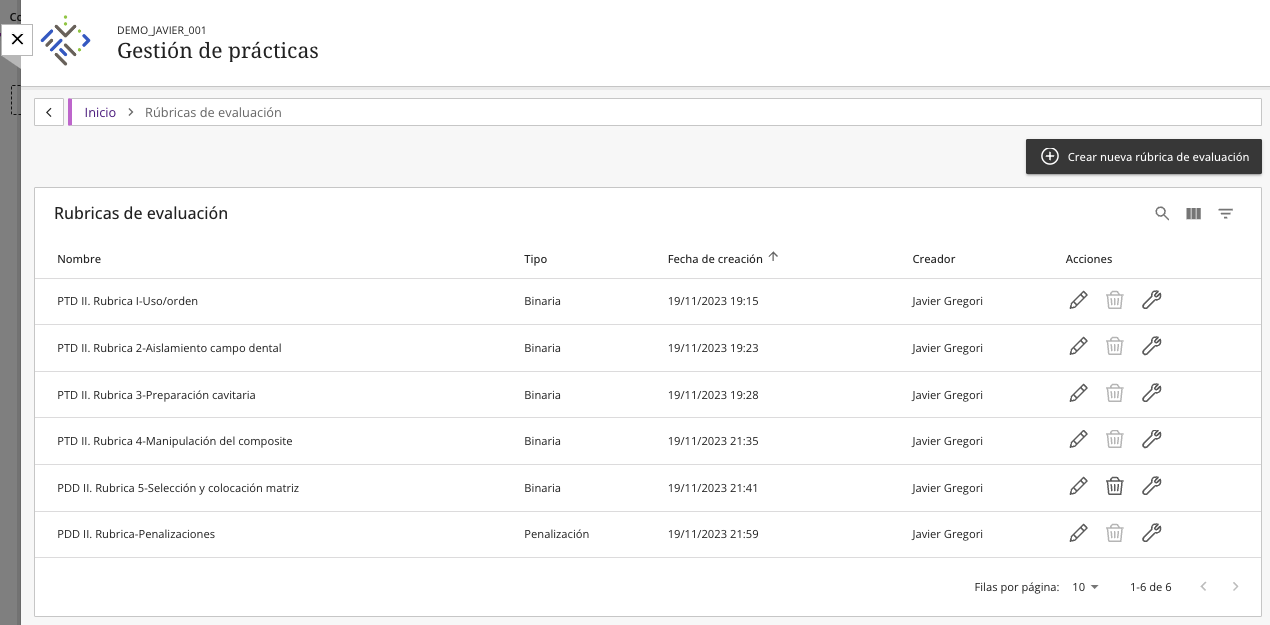
Within this view, it is possible to:
- Create new rubrics by clicking on the "Create new evaluation rubric" button.
- Search for specific rubrics by clicking on the magnifying glass icon and entering some search terms.

- Edit interface columns, allowing fields to be added or removed using the selector that appears when clicking the view icon.
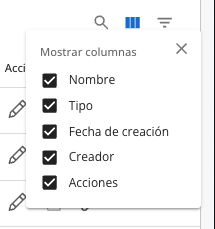
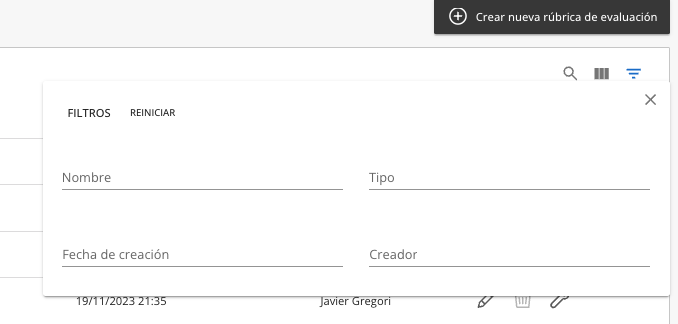
- Filter by name, type, creation date, and creator, allowing quick location of the desired rubrics.
Creating Rubrics
To create a new rubric, click on the "create a new evaluation rubric" button.
This opens a new screen where the following data must be entered:

- Rubric title.
- Rubric type, where you can choose between:
- Binary, where the grading values are YES or NO.
- Decimal, where the grading values are a scale from 0 to 10.
- Likert scale, where the grading values are a scale from 1 to 5.
- Penalty, where negative values are set that are subtracted from the student's grade.
- Rubric description.
- Tags, which allow quick searching for specific rubrics when creating sessions.
- Add evaluation criteria, creating as many as necessary by clicking the (+) sign and entering:
- Criterion title.
- Weight in the rubric, out of 100.
- Criterion description.
- Save the criterion.

It will not be possible to save the rubric if the weight of the evaluation criteria does not add up to 100, a situation indicated by an error message that disables the general save button.

Editing Rubrics

Once the rubric exists in the system, it is possible to perform the following actions from the rubric screen via the actions menu:
- Edit the rubric, allowing modification of the configuration parameters again.
- Delete the rubric, which shows a confirmation message. The delete rubric button is disabled when the rubric is in use in a session.

- Modify the visibility of the rubric, with the available options being:
- Private, only viewable by the teacher who created it.
- Visible to the course, only viewable by the teachers of the course from which it was created.
- Global for all courses, available to any teacher in the system.
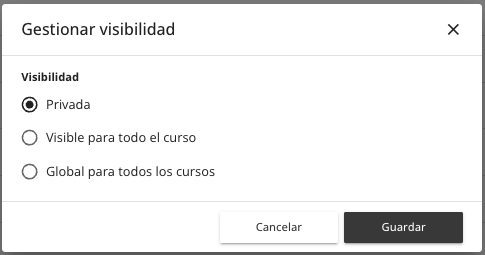
Additionally, clicking directly on the rubric in the list shows a general view of the rubric, allowing the following options:
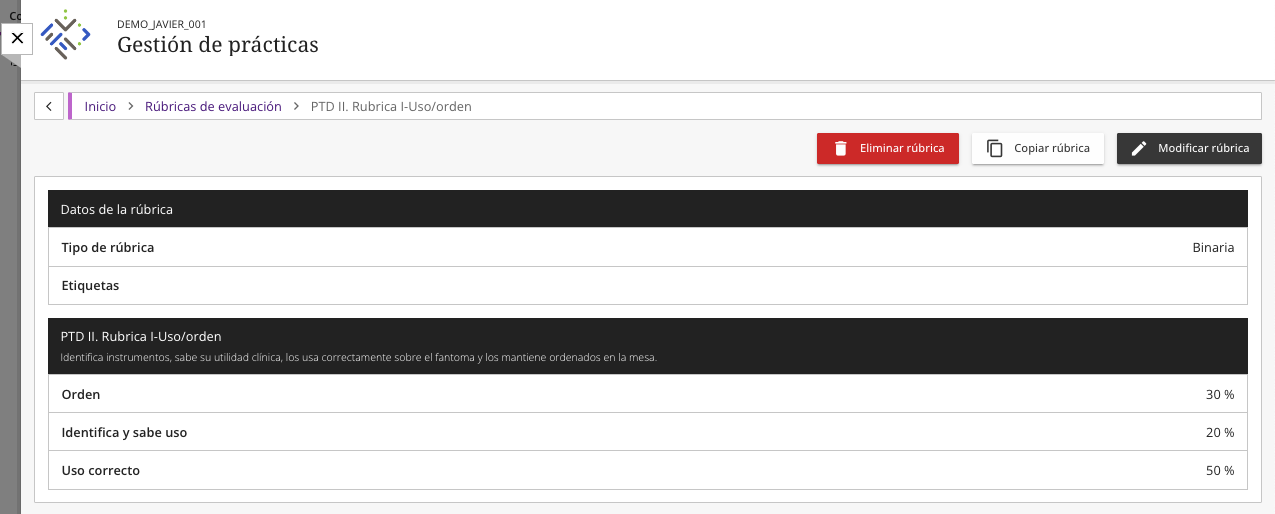
- Delete the rubric, showing a confirmation message for the user.
- Copy the rubric, allowing a copy of the rubric to be created for modifications.
- Modify the rubric, only appearing when the rubric belongs to the user.
This view allows reviewing the basic data of the rubric, such as its type and the tags it belongs to, as well as the criteria and weights.
Sessions
Access is via the sessions section on the main screen.
Session overview
The sessions screen has a structure very similar to that of rubrics, allowing sessions to be created and viewed. The fields displayed in this interface are:
- Session name.
- Session start date.
- Session end date.
- Actions (edit, delete).
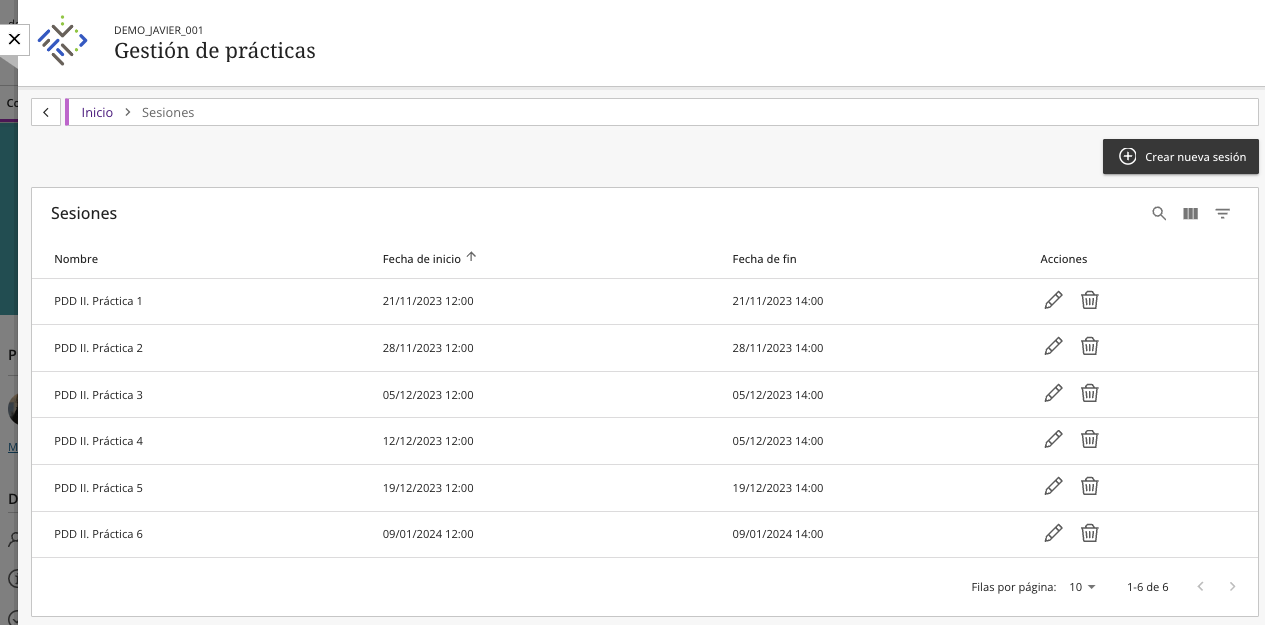
The functionality in this screen is as follows:
- Create sessions, by clicking the “Create new session” button.
- Search sessions, using the magnifying glass icon, which allows searching for sessions by the first characters or words of the name.

- Edit columns, selecting the columns to display in the interface using the corresponding selector.
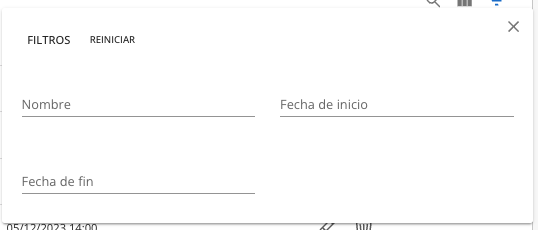
- Filter sessions, by name, start date, and end date of the session.
Creating Sessions
To create a session, click the “create new session” button.
This takes you to the session creation screen where the following data must be included:
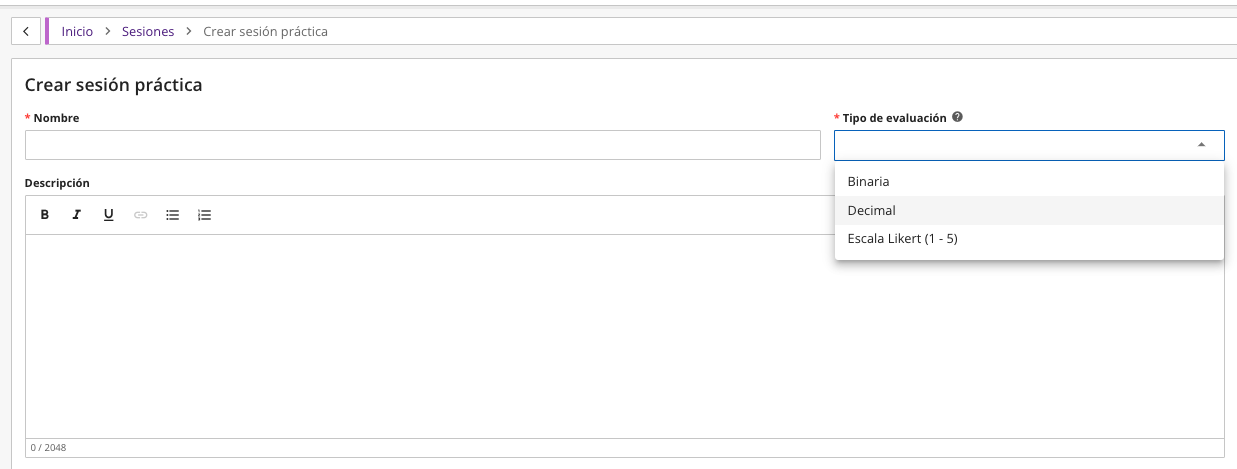
- Session name.
- Evaluation type, which determines the type of rubrics that can be associated with the session, choosing between binary, decimal, or Likert scale.
- Session description.
- Scheduling type, choosing between:
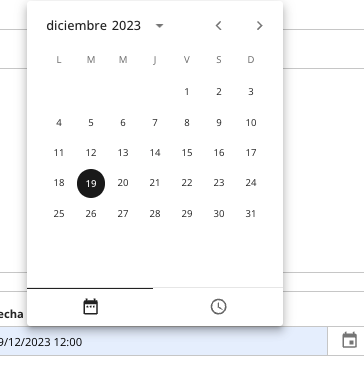
- Single session, requiring only a start date and time and an end date and time.

This is done using the date and time selector included in the corresponding field.
- Recurring session. To schedule repeating sessions, select the recurring option, opening the session repetition possibilities. These options are:

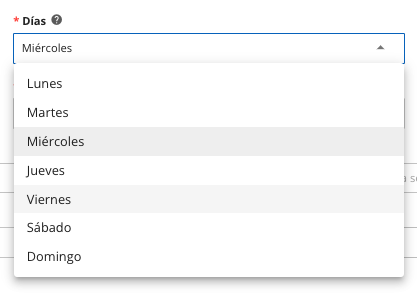
- Select the days of the week for the session to repeat. The days are added to the list from the dropdown menu.
- Date from which the sessions should start repeating.
- Date until which the sessions should continue repeating.
- Session start date.
- Session end date.
- Grading column where the session grades will be stored. You can select an existing column in the course from the dropdown or enter the column name. If the column does not exist in the course, it will be created automatically.
- Instructors, allowing selection from a dropdown of the course instructors who will evaluate this session; if none are selected, all assigned to the course are included.

- Students, allowing selection of all course students, a manual selection, or groups within the LMS.

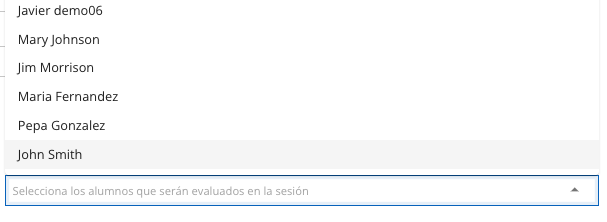
- By choosing the “Select students” option, you can add the desired students one by one from the dropdown.
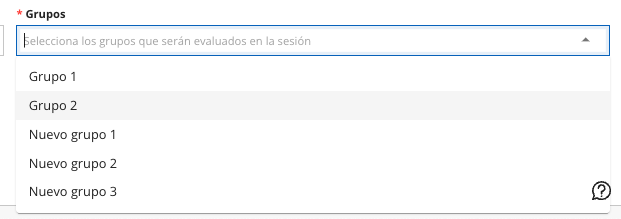
- By choosing the “Select groups” option, you can choose from the existing groups in the course.
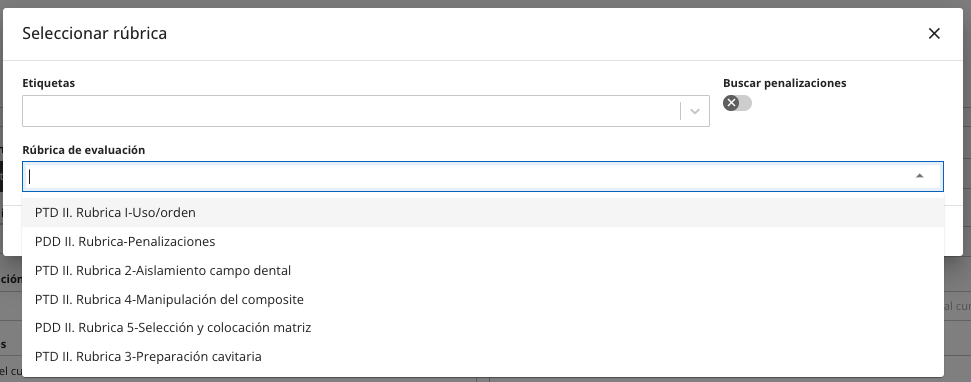
- Evaluation rubrics, allowing evaluation rubrics to be added from those present in the system, whose type (binary, decimal, Likert) matches the type defined in the session and to which the user has access. To add rubrics, click the (+) symbol.
The rubrics to be added are selected from the dropdown, allowing filtering by tags or changing the mode to only search for penalty rubrics.
Selecting a rubric previews it, and you need to click “Add” to incorporate it into the session.
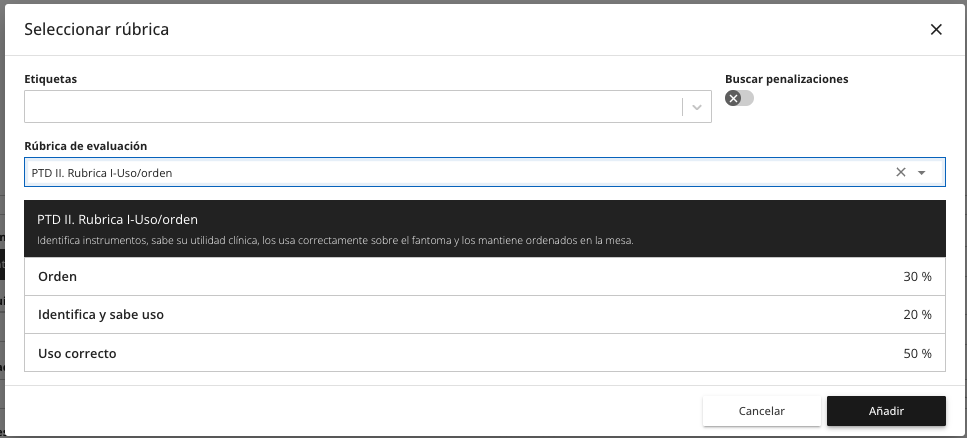
Once the different rubrics are incorporated into the course, their percentages must add up to 100; otherwise, a warning is displayed, and the save button is disabled.
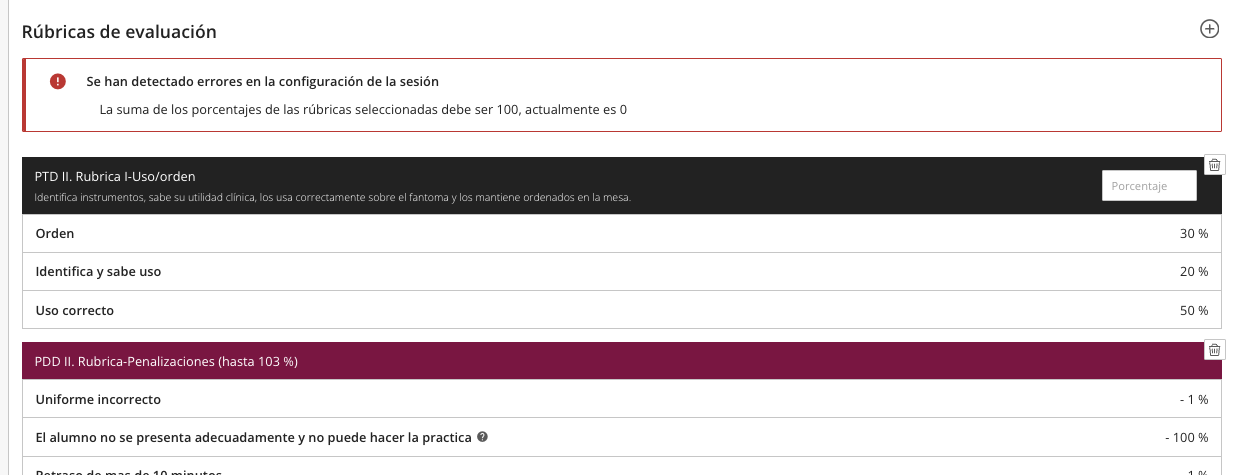
- Create the session, by clicking the “Create” button.
2.2.3. Editing Sessions
Once created, sessions appear in the session list, where you can access the actions menu.

This allows editing sessions, changing the desired elements within each session.
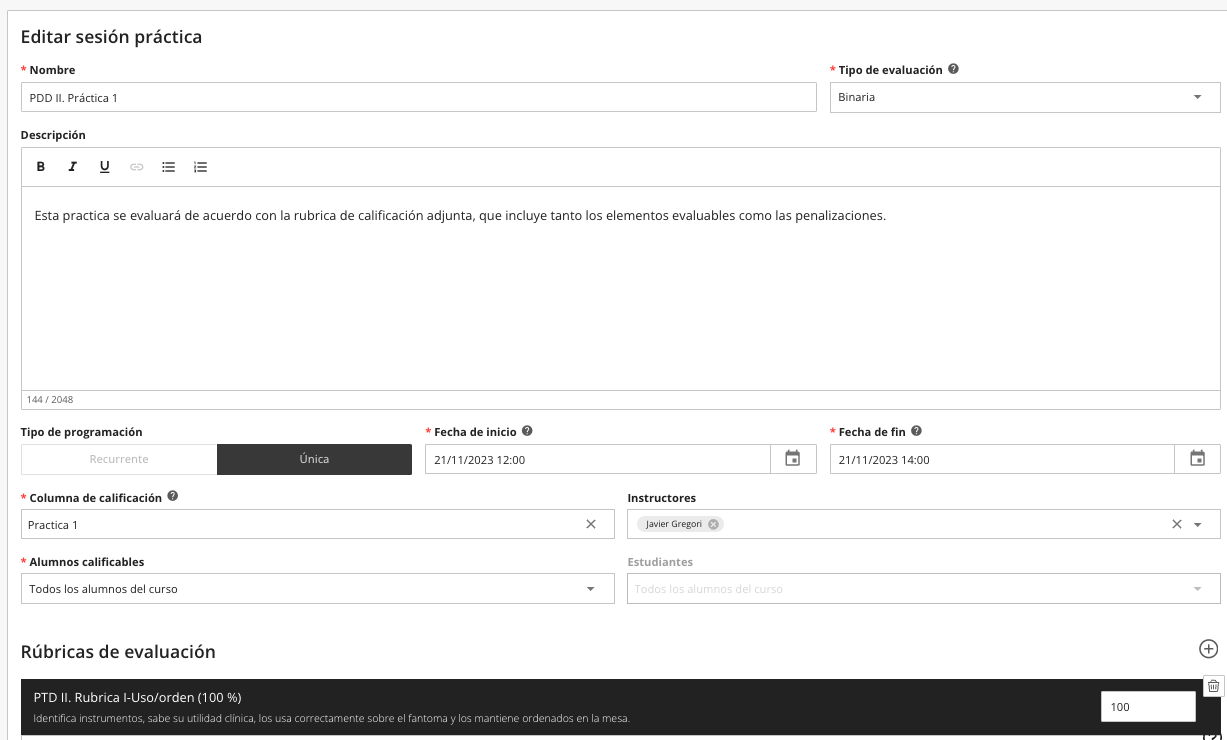
Similarly, it is possible to delete sessions, which requires accepting the confirmation message.

Grading Process
The teacher accesses the session grading screen by clicking on the rubric in the application’s rubric list.

From this screen, you can see the basic elements of the session, such as:
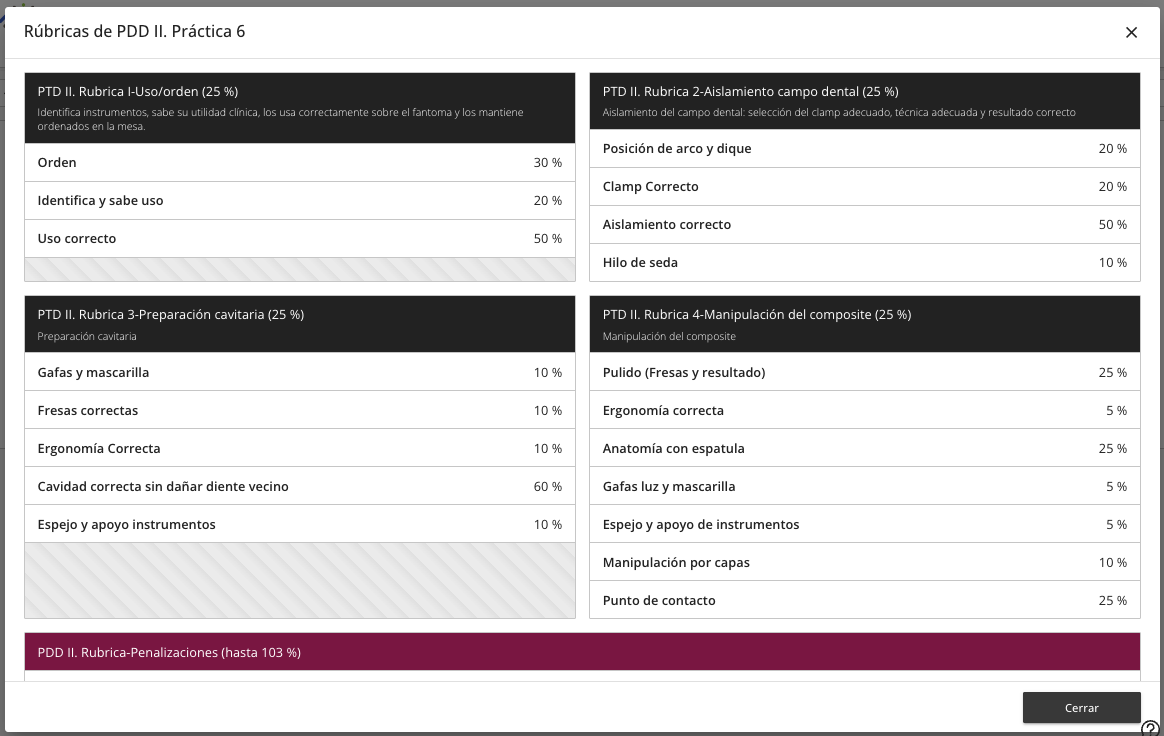
- Session grading rubric (read-only), showing the rubric with its corresponding weights.
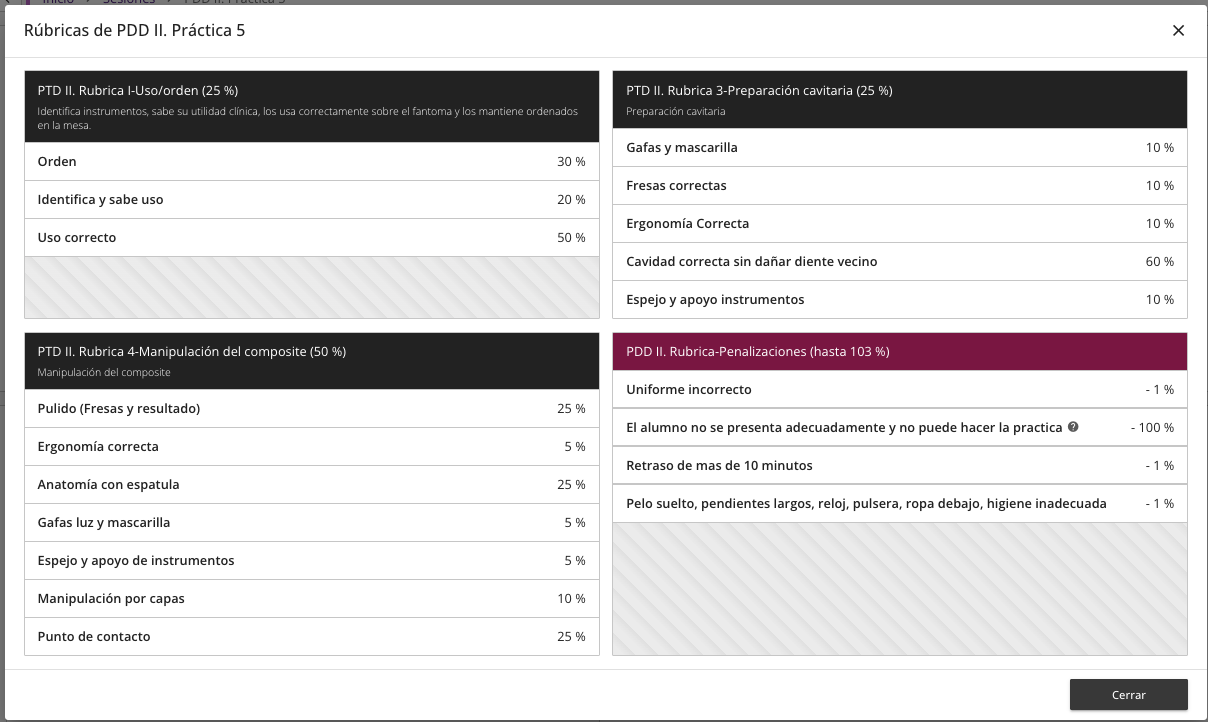
- Publish the results, which makes the corresponding session grading column visible in the grade center, allowing students to see the grade obtained. This requires accepting the confirmation message.

- Basic session data, such as instructors, evaluation method, start date, and end date.
The grading view differs if groups or individual students are selected. If groups are selected, students are presented grouped under the group name.

Clicking on the group icon accesses the grading of the students in that group. This view includes a search function to quickly locate individual students.

If the session is configured for all students or a manual selection, they are displayed directly and without grouping. This view also includes the search functionality.

The application is designed to offer an optimal experience on tablets and mobile devices.
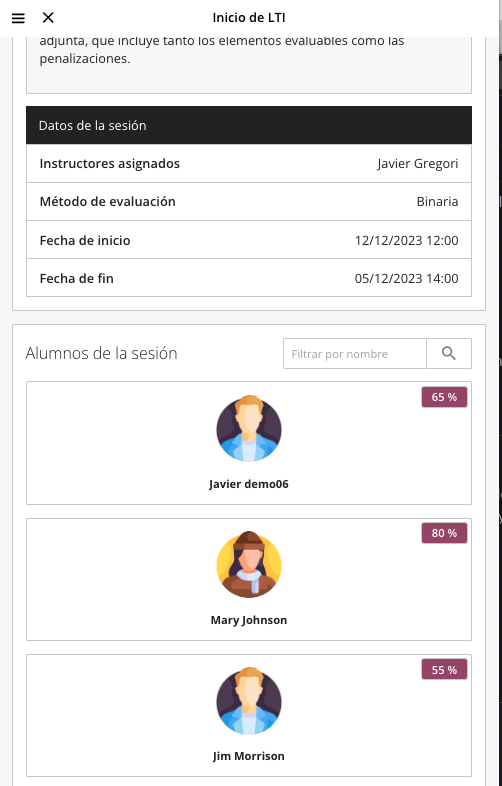
To grade a student, select their card from the list, which will display the evaluation rubric where the teacher can grade according to the chosen scale and include comments for the student. It will also be possible to penalize the student if penalty rubrics are included.
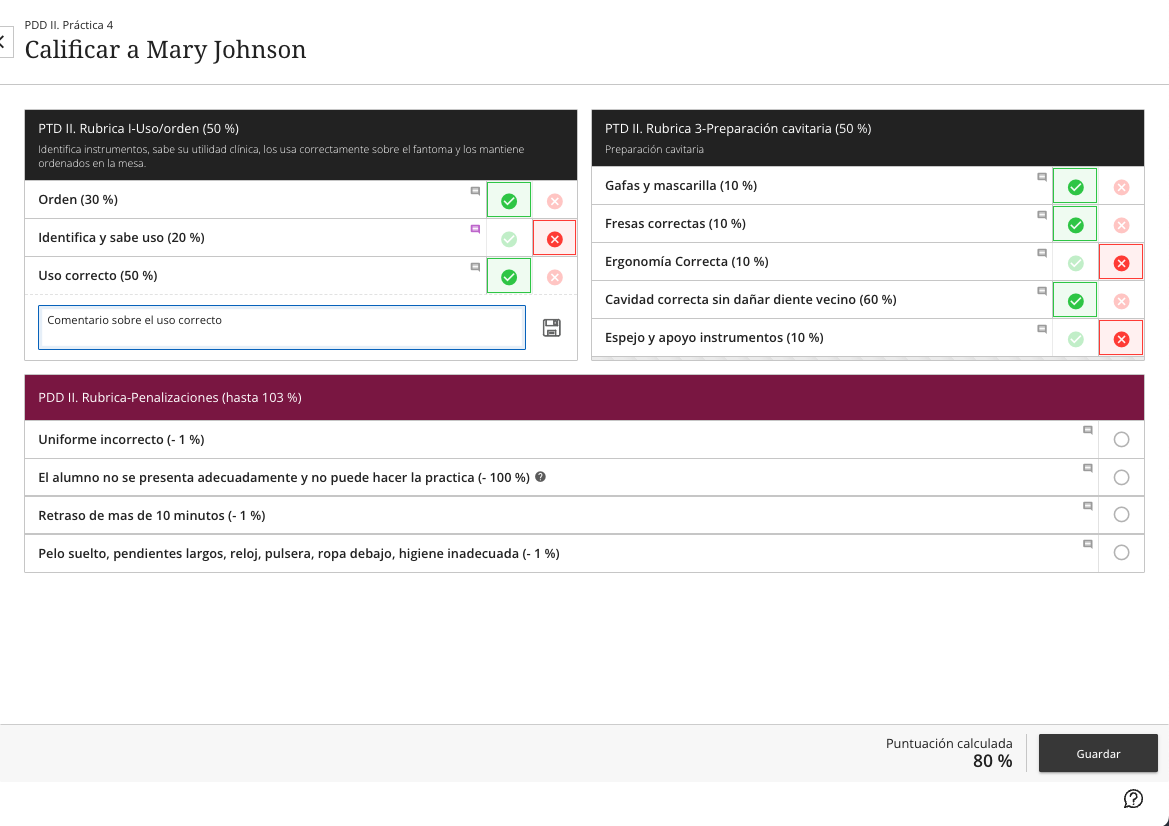
Once the student is graded, their card shows the obtained grade.

2.2.5. Grades in the Grade Center
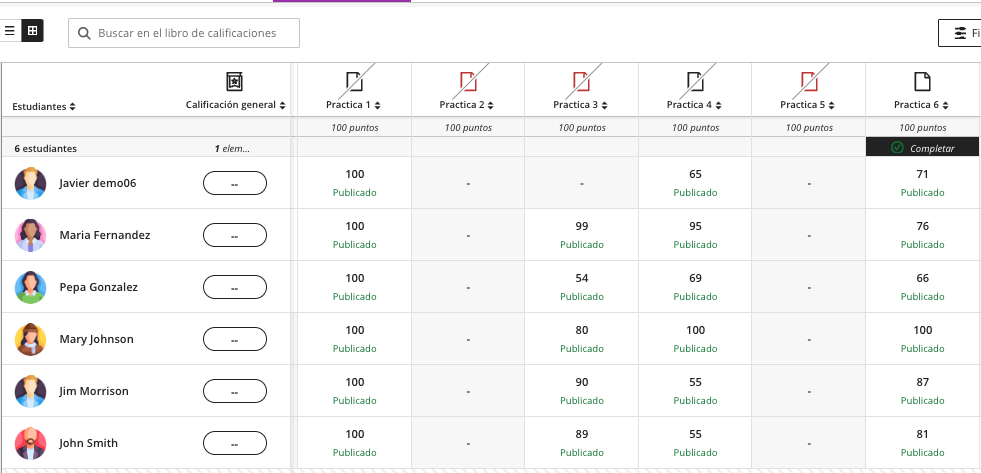
In addition to the grading rubric shown to students, which can be consulted in the application itself, the numeric score of the different practices is included in the grade center, each in the column defined during session creation. These columns can be freely used to perform the grade calculations the teacher deems necessary.
Analytics
Teachers access this section from the “Analytics” section on the main application page.
Within this section, there are two subsections, student progress in the course and student progress by rubric.

Student Progress in the Course
The student progress analytics in the course allows selecting a student from a dropdown and displays a graph where the X-axis is the completed practices and the Y-axis is the grade obtained.
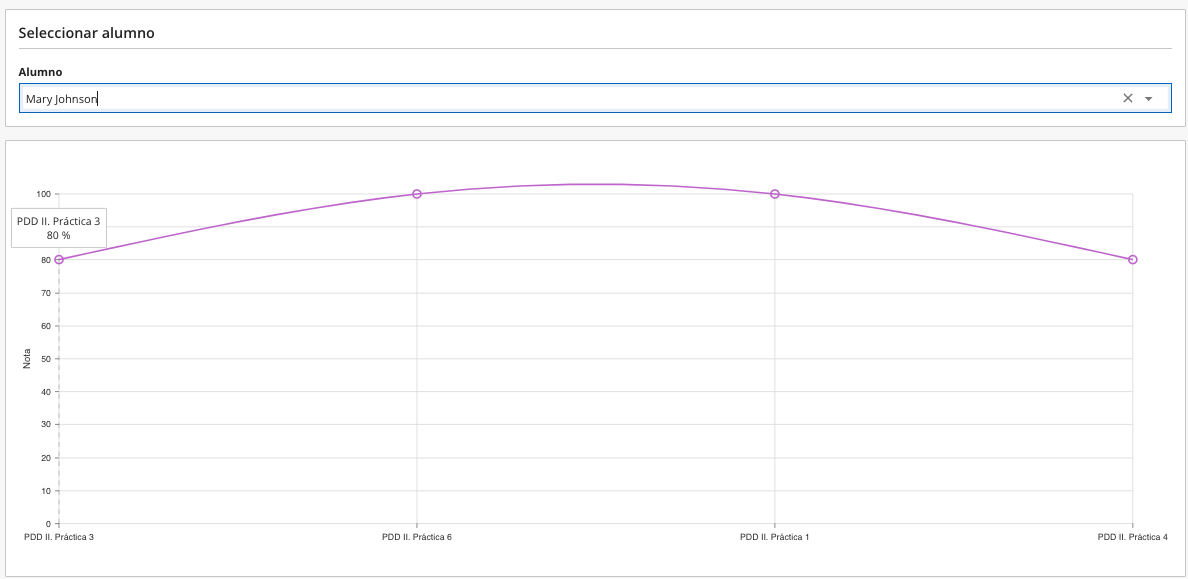
Similarly, access to all practice sessions is provided along with the name of the grading column and the grade obtained by the student.

Student Progress by Rubric
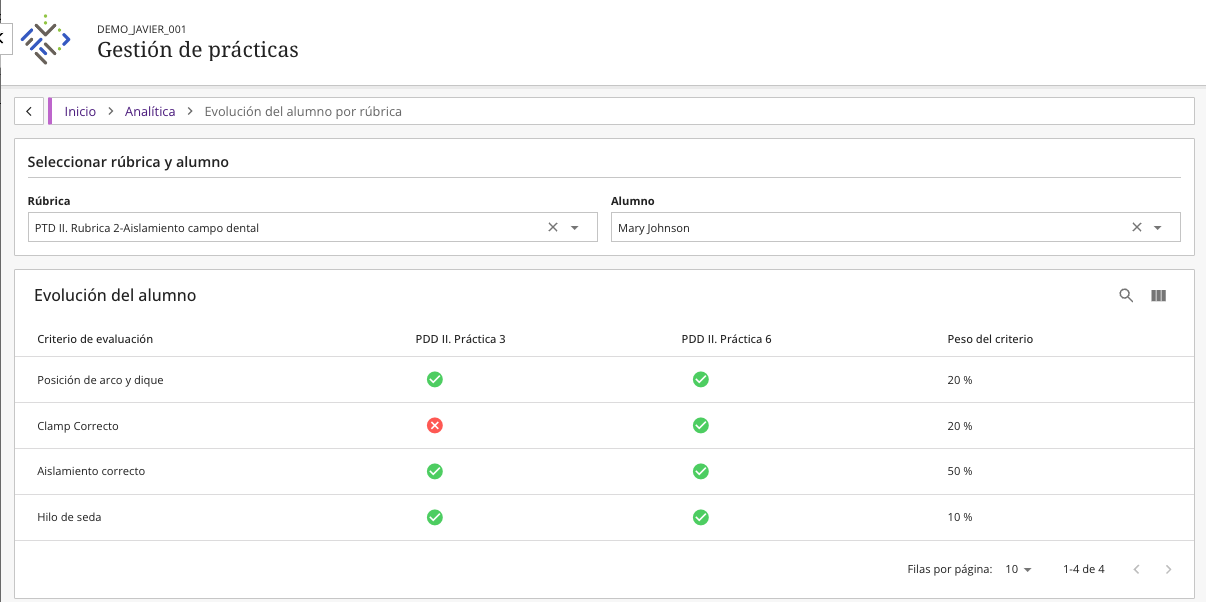
The student progress by rubric report allows selecting a rubric and a student; from here, each row represents an evaluation criterion of the rubric and each column a practice where that rubric has been used, along with the associated weight of the criterion. This allows checking the results obtained by the student in each criterion for each of the practices.
Student workflow
Students access the course through the LTI access to the tool, which must be present in the course and available to students.
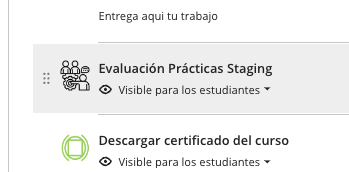
Students have access to the Sessions and Analytics sections.

Student Session overview
When accessing the sessions section, the user sees a list of all sessions where they are enrolled as a student by the teacher, along with the start date and end date.
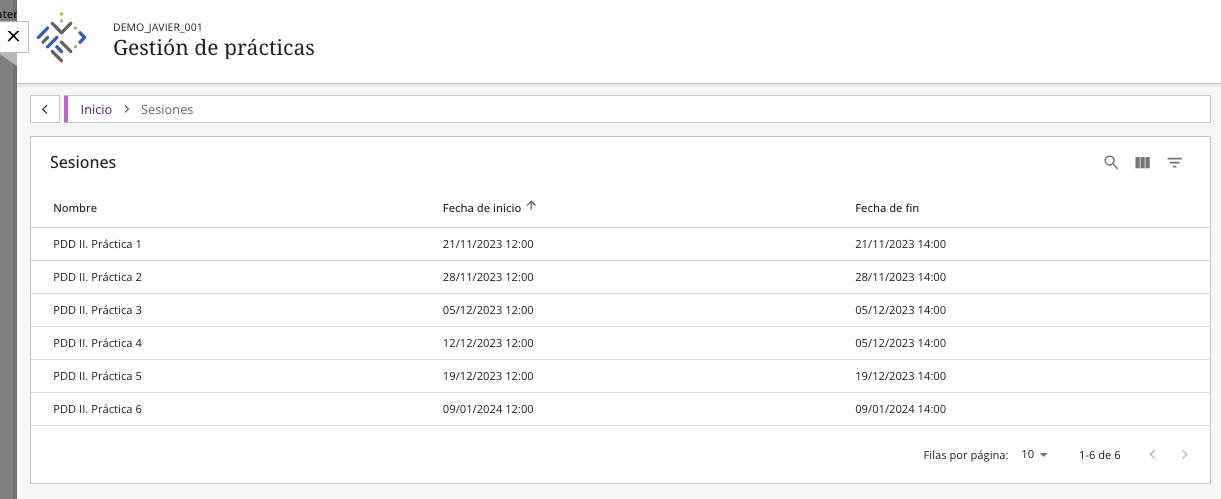
The student can access each session and review the following elements:
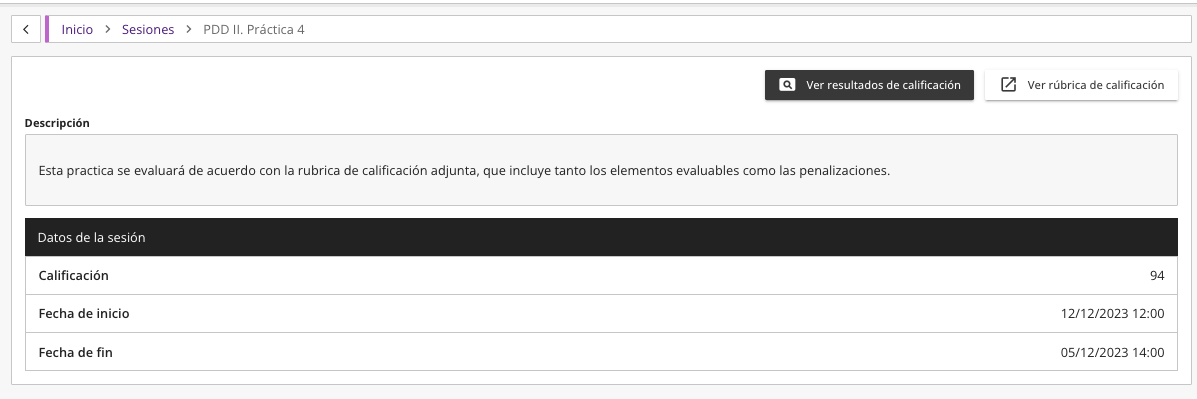
- View the grading rubric (read-only).
- View the grade (if published by the teacher) along with comments.
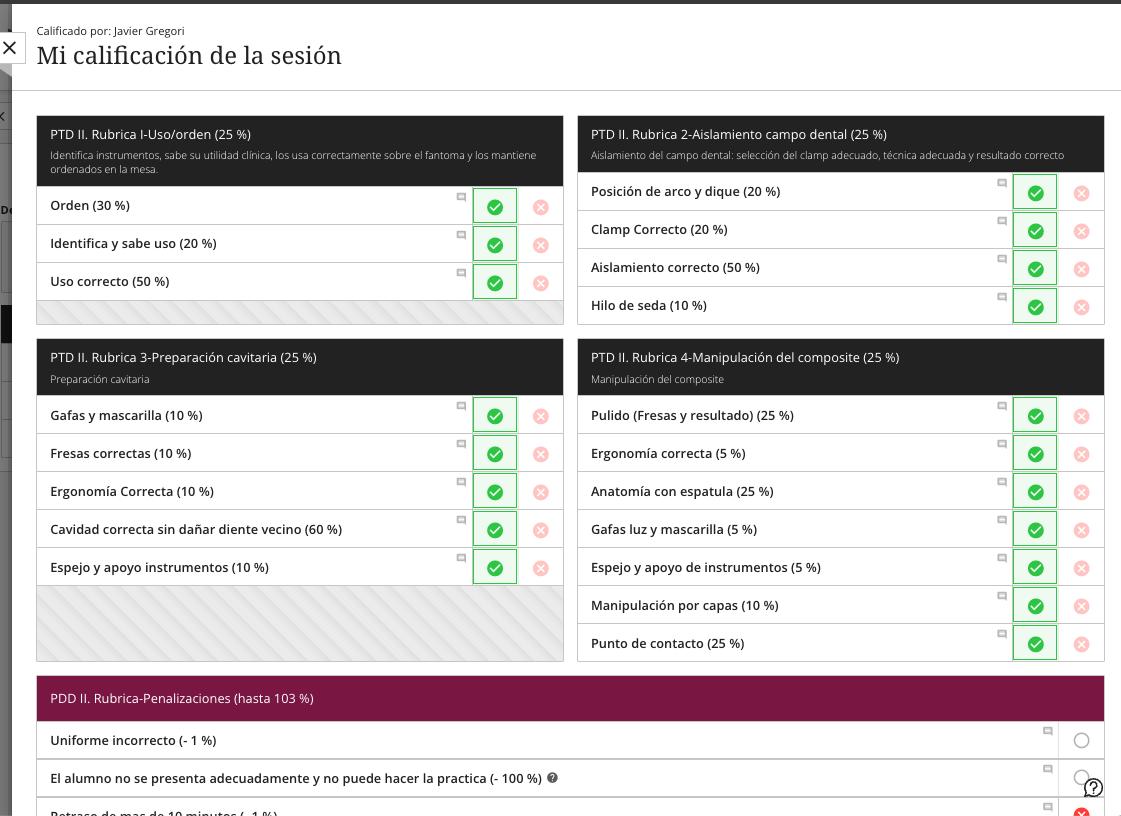
- View basic session data.
Student Analytics View
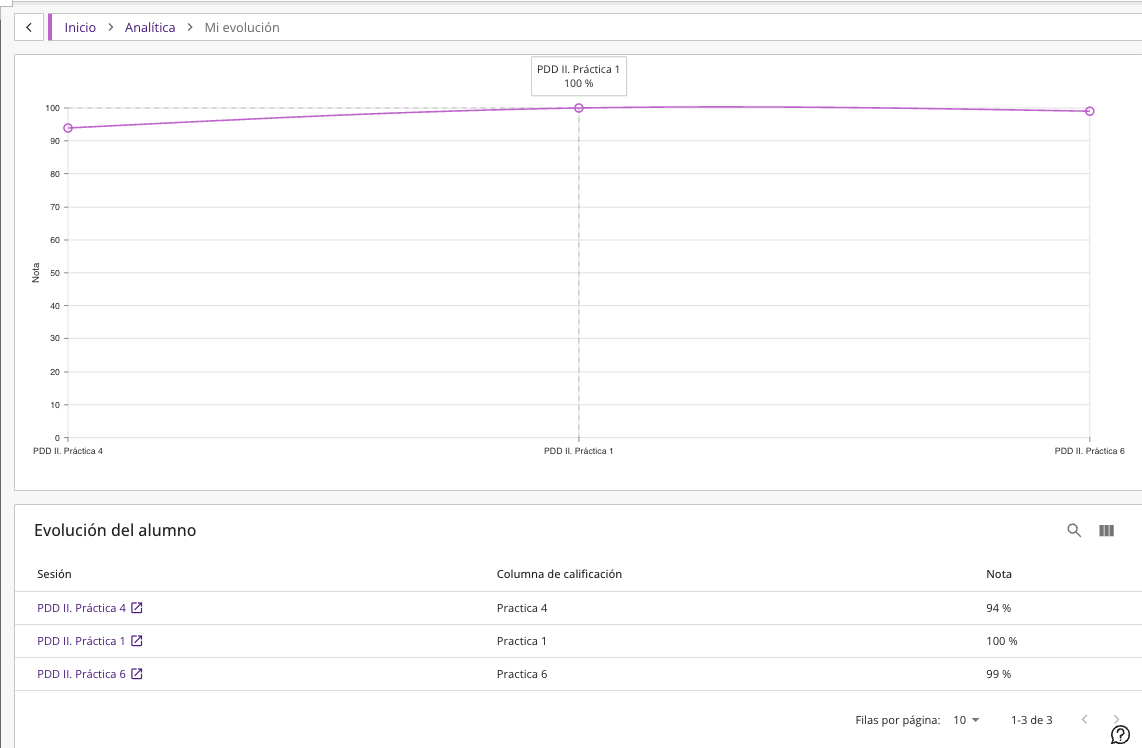
In the analytics section, the student only has access to a tool called “My progress in the course”.
This tool provides a graphical visualization where the X-axis represents the practice sessions in which the student is enrolled, and the Y-axis represents the grade obtained in these sessions. The student also has direct access to the sessions to view them in detail.
Help us improve! Do you have any suggestions or improvements for this documentation? Let us know!