Zoom2 APP
Introduction
Zoom2 is an application that enables the management of ZOOM recording storage linked to the LMS platform. The recordings are stored in an institutional repository (managed by the client) based on AWS S3 or compatible repositories.
Need more information? Want a demo?
Write to us and we’ll get in touch with you schedule a demo.
Accessing Zoom2
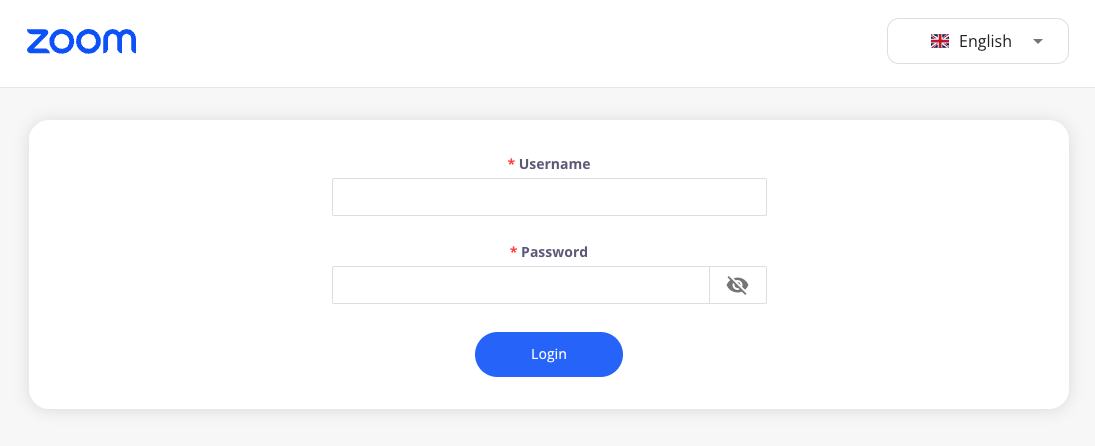
Access to Zoom2 is done via an external URL, where you log in with a username and password. In the top-right corner of the login screen, you can select the application's language.
Main Interface
Upon logging into Zoom2, users see the main interface with three primary tabs:
- Files: Lists Zoom videos registered in Zoom2.
- Summary: An overview and usage statistics of the application.
- Processes: For creating and managing automated processes.
File Management
Files appear in the application as a result of the different processes configured within. Therefore, the first step is setting up sync processes with Zoom.
File Management – Overview
To access the file section, you must select this tab in the application's header.

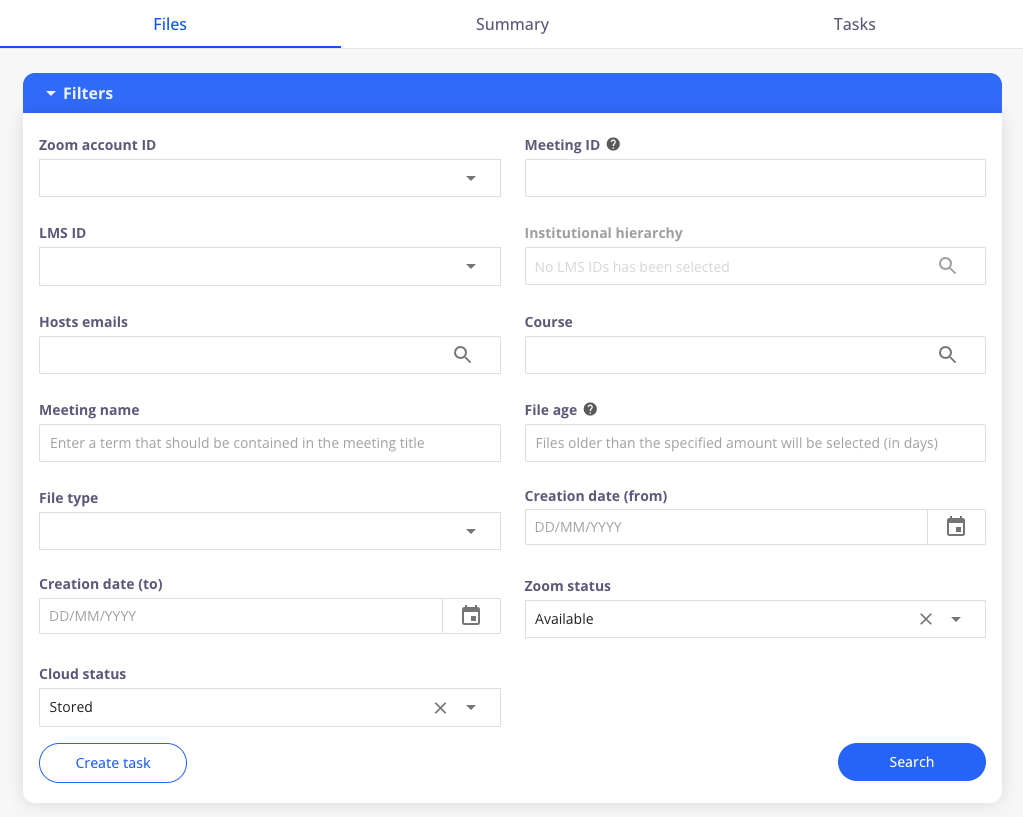
File Management – Filters
From the files view, you can search for Zoom recordings stored in Zoom2 using the following filters:
-
Zoom Account ID: Allows you to search for recordings stored in Zoom2 by selecting a Zoom account ID from the dropdown.
-
Meeting ID: Allows you to specify a meeting ID to display recordings in Zoom2 associated with it.
-
LMS ID: Allows you to specify an LMS ID to display recordings associated with it. LMS IDs are tied to LTI Zoom integrations configured in the LMS.
-
Institutional Hierarchy: Lets you specify LMS hierarchy nodes to see recordings associated with that node.

-
Host Email: Allows you to specify a host's email to view recordings linked to them.
-
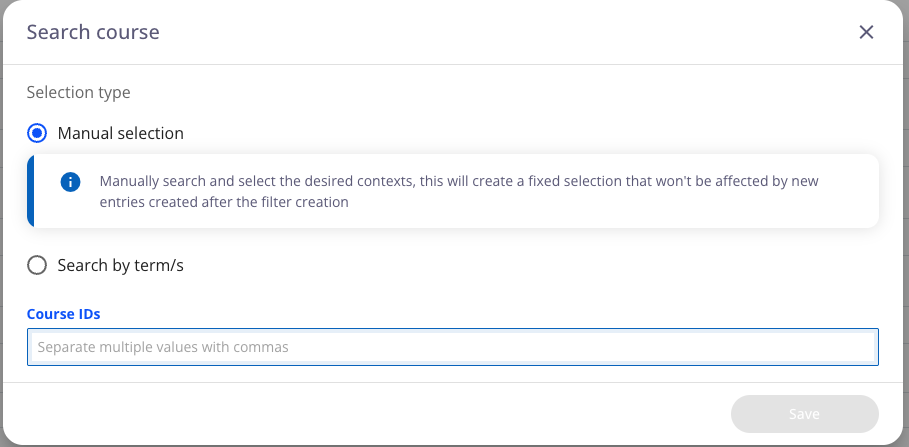
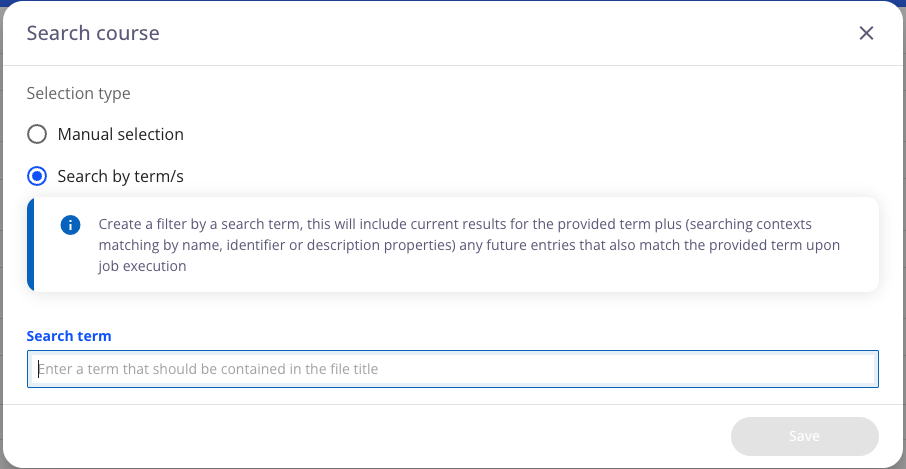
Course: Allows you to specify a course ID in the LMS to view related recordings. Searches can be done manually or by terms in the course name or description.
-
Meeting Name: Lets you specify a meeting name to view associated recordings.
-
File Age: Lets you search for videos older than a specified number of days.
-
File Types: Lets you select file types to search within Zoom2. Available types:
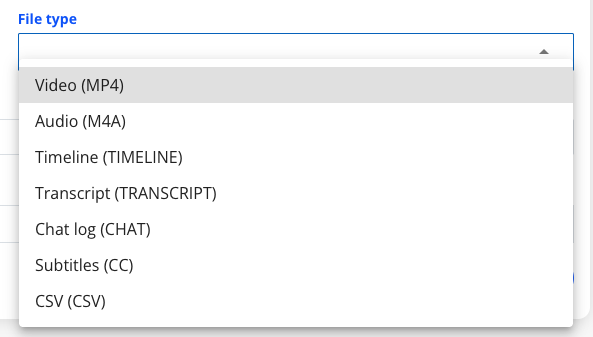
- Video (MP4)
- Audio (M4A)
- Timeline (TIMELINE)
- Transcript (TRANSCRIPT)
- Chat Log (CHAT)
- Subtitles (CC)
- CSV (CSV)
-
Creation Date (From): Define the start date to filter Zoom recordings.
-
Creation Date (To): Define the end date to filter Zoom recordings.
-
Zoom Status: Specify the Zoom status of the recordings. The default is "all", with options to filter by:
- Available
- Pending deletion
- Deleted

-
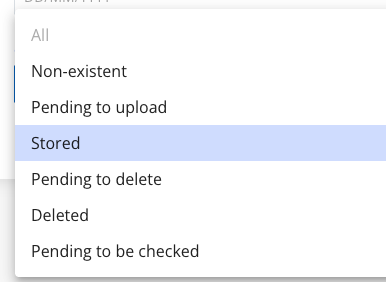
Repository Status: Specify the storage status of the recordings in Zoom2's repository. Options include:
- Non-existent
- Pending storage
- Stored
- Pending deletion
- Deleted
- Pending verification
These filters allow both direct search of files and quick creation of processes.
File Management – Recordings
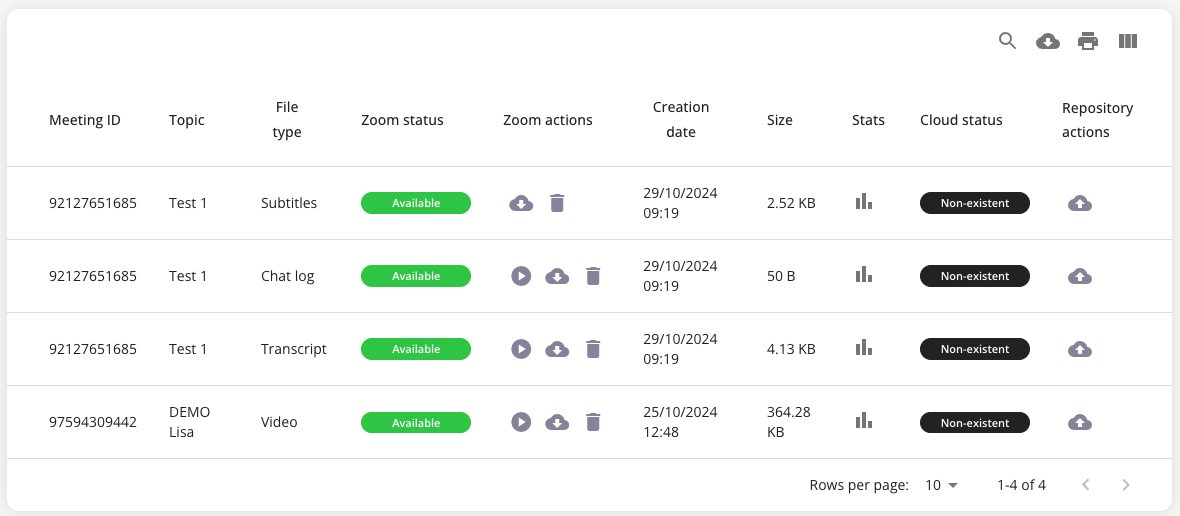
In the recordings view, after applying the filters, users can perform actions from the top-right of the box:

- Search for specific videos
- Download a CSV with video data
- Print the list of videos
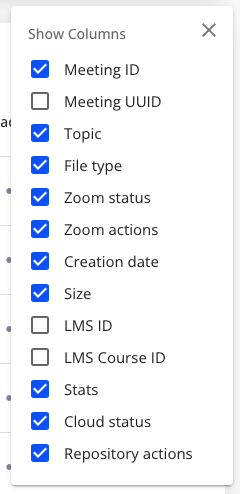
- Select visible columns. You can choose fields to display via a dropdown.
Finally, each entry has a set of available repository actions. Icons vary based on availability:

- Download the recording
- View the recording
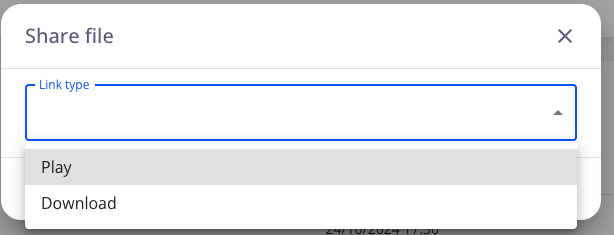
- Share the recording. This button generates two links: one for playback and one for download
Summary View
To access this view, click on the “Summary” tab in the application header.
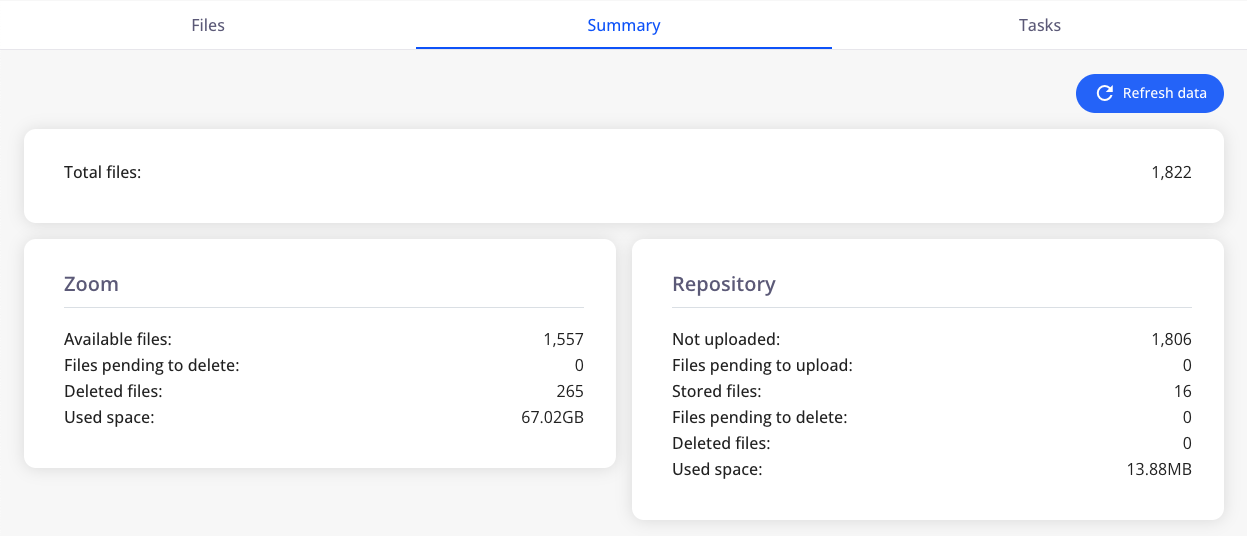
This view provides the following information:
- Total number of files processed by the application
- Zoom Information
- Available files
- Files pending deletion
- Deleted files
- Storage used
- Repository Information
- Not uploaded
- Files pending upload
- Stored files
- Files pending deletion
- Deleted files
- Storage used
Processes View
To access the processes view, click on the “Processes” tab in the header. This view provides access to all processes created in the application.
Active processes are marked with a blue indicator, while inactive ones are marked gray.

To create a new process, click the "+" button at the top-right corner of the processes page.
This opens a form where you must specify:
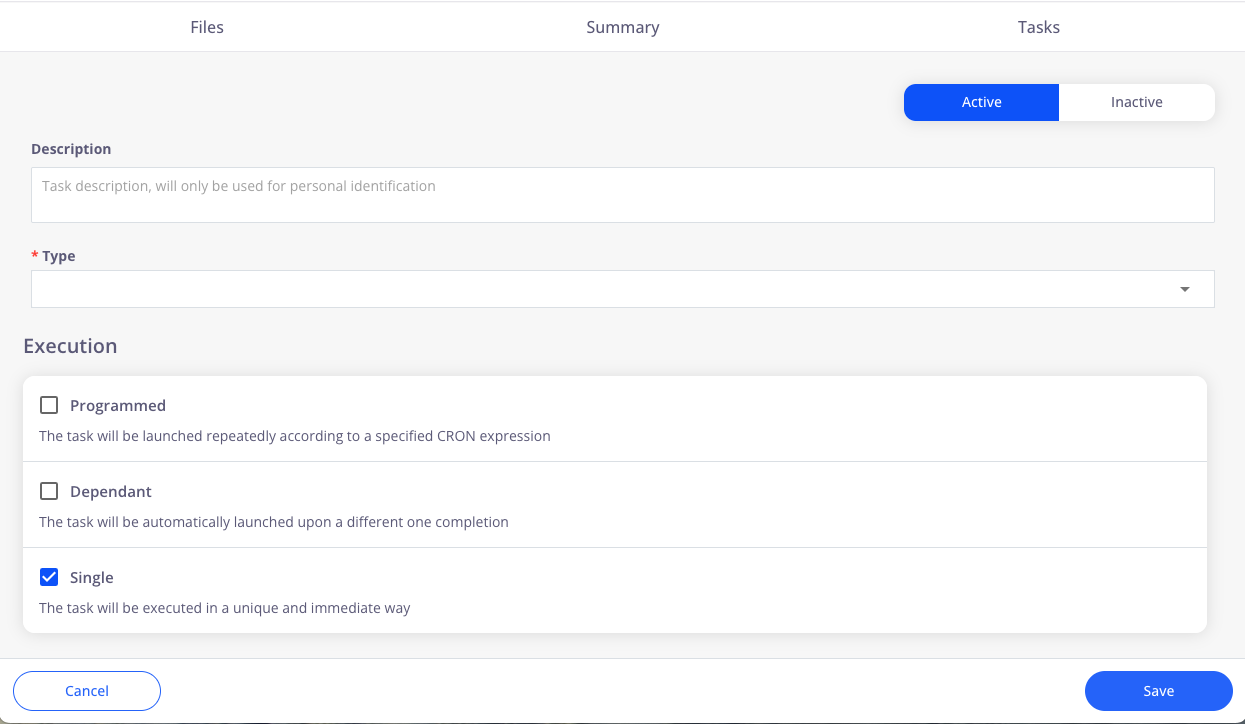
- Whether the process is active or inactive via a toggle.
- The type of process. You can choose from different types, each with specific filters and functions:
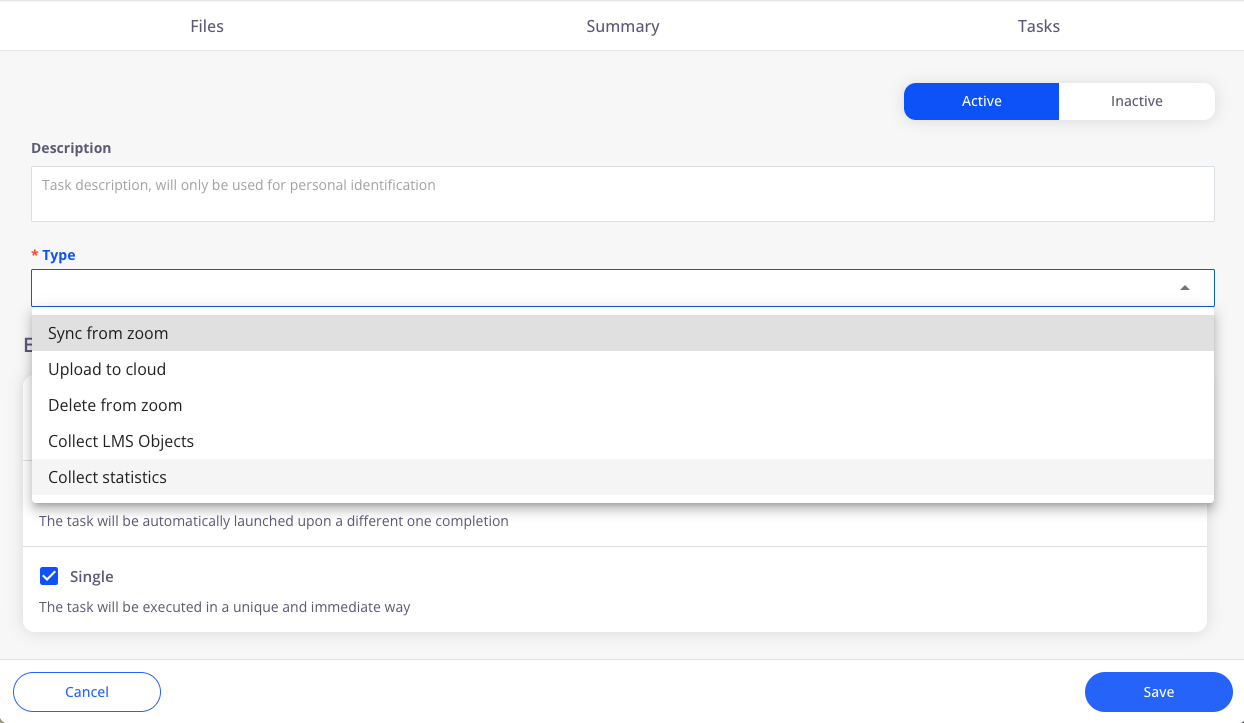
- Sync from Zoom. Requires specifying the 'LMS ID tracking field', the course ID tracking field, and the max number of files per request.

- Upload to Repository. This allows you to configure Zoom deletion once the upload is completed.

- Delete from Zoom. You can set a safety condition to only delete files that were uploaded to storage. Also, choose the deletion method: direct deletion or move to trash.

- Get LMS Objects. Configure actions to retrieve LMS hierarchy nodes and courses.

- Get Statistics. Retrieves file statistics from Zoom and stores them in the repository.

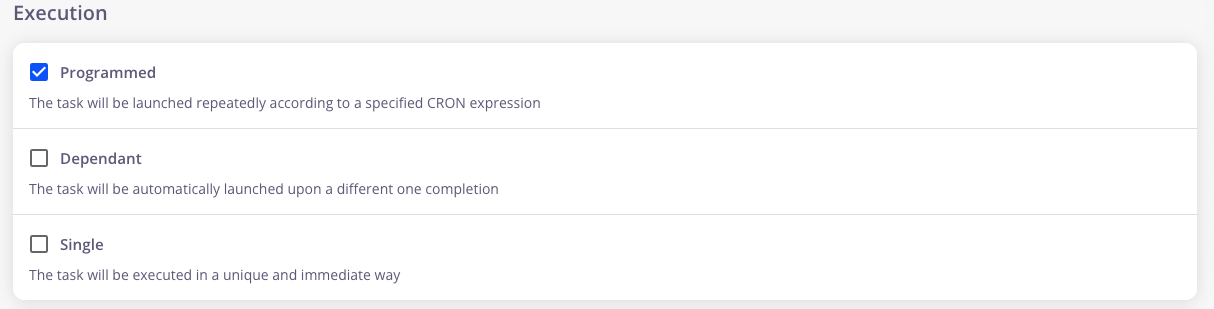
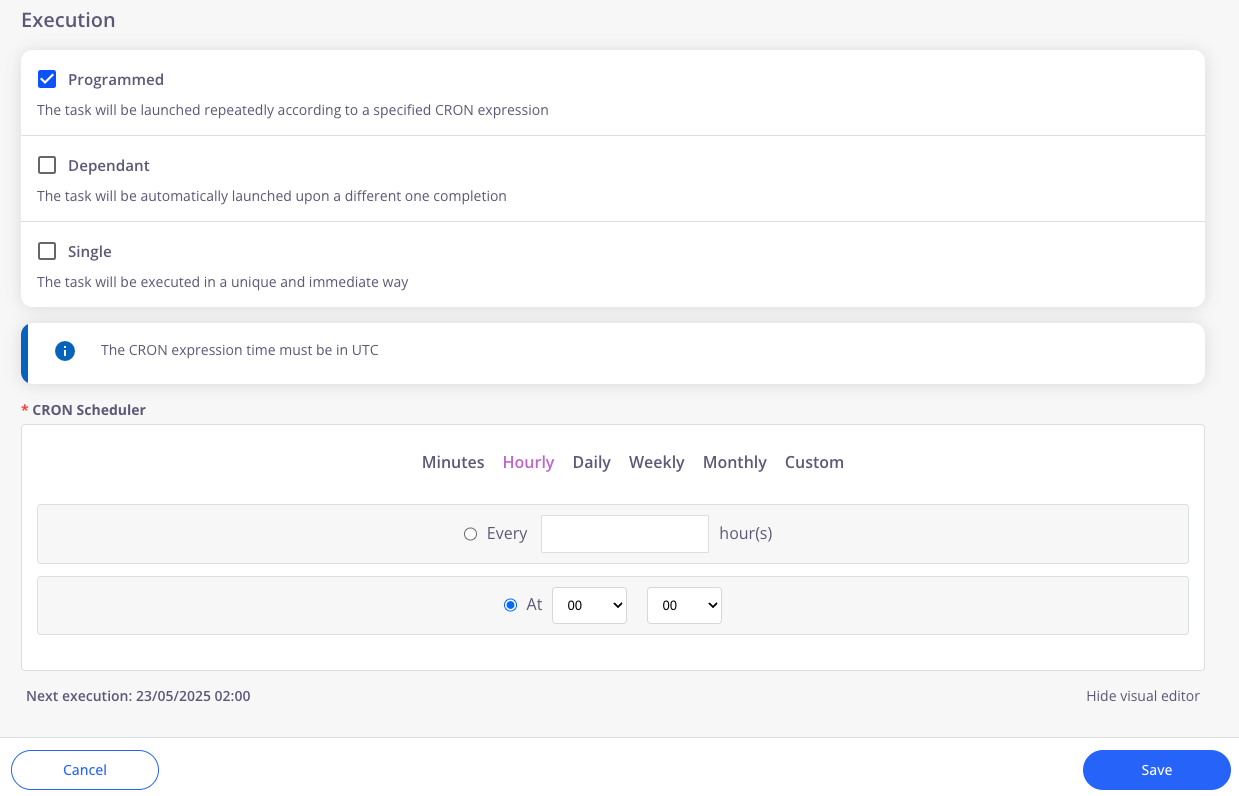
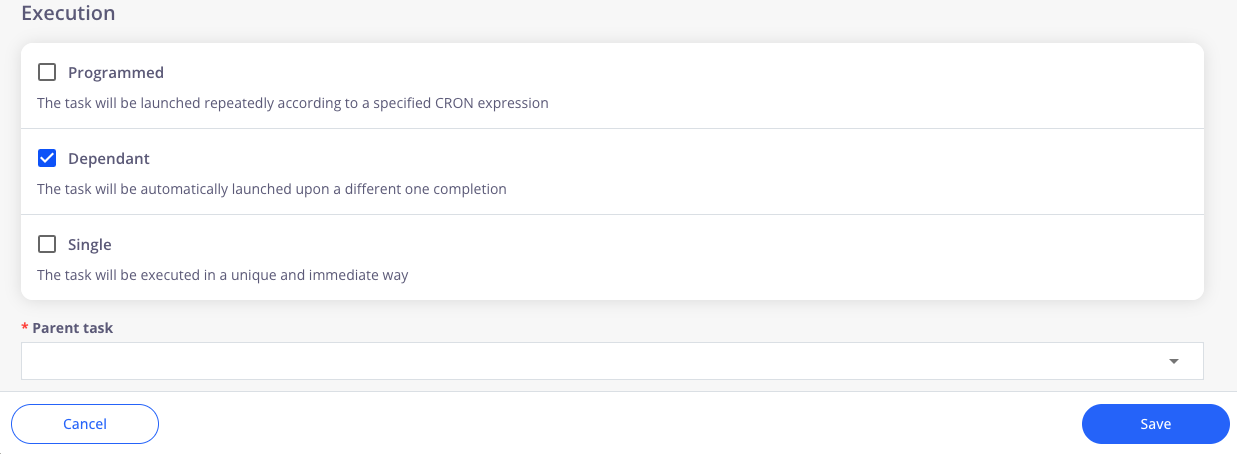
- Process Execution. Processes can run in three modes: scheduled, dependent on another process, or one-time.
For scheduled processes, a CRON expression is required. The tool includes a visual editor to simplify this task.
For dependent processes, a dropdown appears to select the "parent" process, after which the process will run immediately.
Help us improve! Got suggestions or feedback on this documentation? Write to us!