Notifications App
Introduction
The notifications app extends the LMS's notification capabilities by allowing a higher level of customization and segmentation for different audiences. The app defines notification processes that can be scheduled using a CRON expression or executed manually.
Need more information? Want a demo?
Write to us and we will get in touch with you schedule a demo.
Likewise, it integrates with the Watermark survey system.
Accessing the App
The notifications app is an administration application, and as such, it can be accessed through the Admin Panel, in the Tools and Utilities section.
General Configuration of the App
The notifications app must be configured before scheduling notification processes. To do this, click on the configuration button located in the top right corner of the app.
Survey Configuration (Watermark)
If you want to integrate the "EvaluationKit" app from Watermark, click on the "configure integration" link.
On the configuration screen, include the client's Watermark instance URL and the token to access the instance via the API.
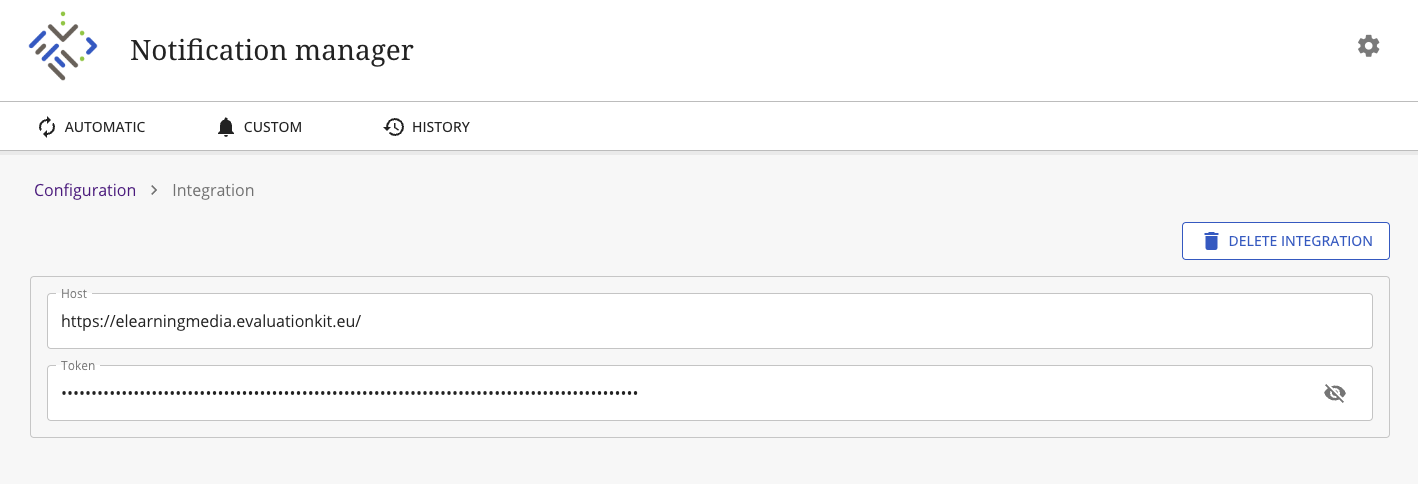
Through this interface, you can also remove the integration by clicking the "Remove Integration" button.
The Watermark survey integration is optional and does not affect the general functionality of the app.
Brand Configuration
The app allows creating different brands associated with nodes or sections of the LMS. At least one brand must be configured for the app to work correctly. Brands appear at the top of the configuration screen.

To add a new brand, click on the "+ Add New" button and include the following information:
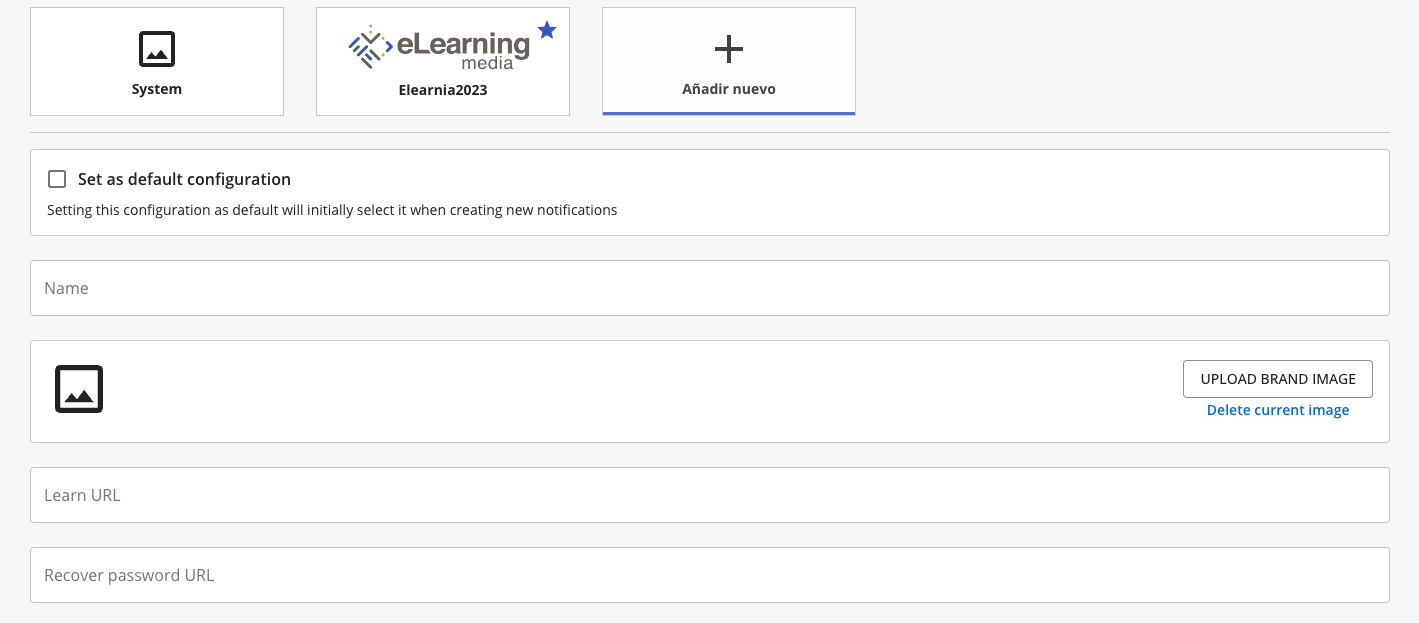
- Select as Default Brand. This allows the brand to be used by default in notifications.
- Name. The name of the brand.
- Upload Brand Image. This allows you to define an image for the brand, as well as remove the current one.
- Blackboard Learn URL. This allows you to include the target platform URL.
- Password Recovery URL. This allows you to include the password recovery URL in Blackboard Learn, which by default is the platform URL followed by "/webapps/blackboard/password".
- Email and SMS Configuration. The notifications app does not use its own servers for sending emails but allows configuring the client's servers. This provides greater control over notifications and allows using their anti-spam features. Configuration is done by filling in the following fields;
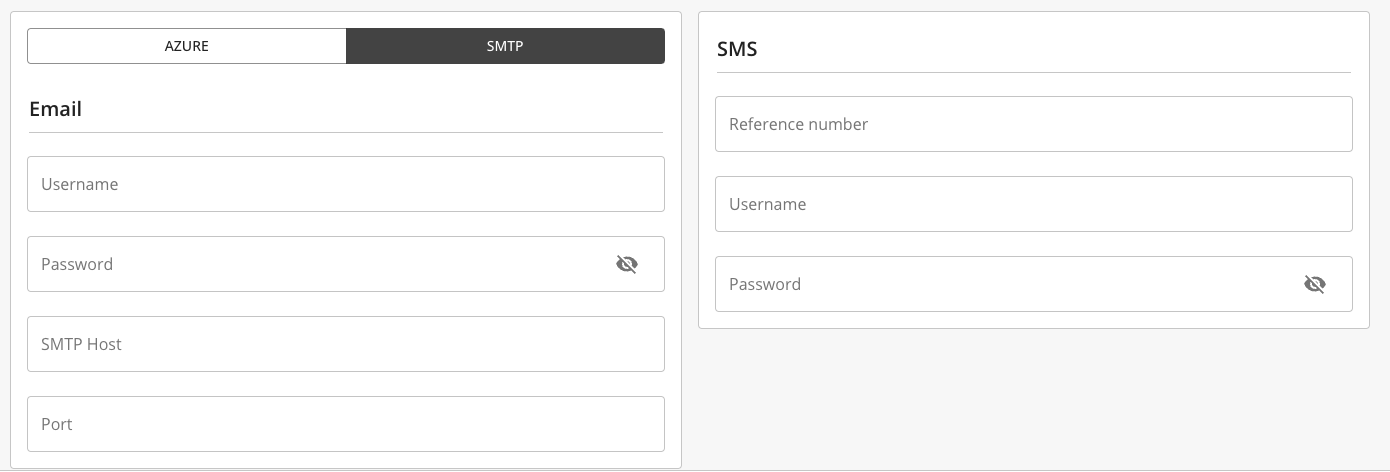
Configuring the SMS module requires the client to have an account with the provider Esendex.
- Alternatively, it is also possible to configure email servers compatible with Azure Graph API.
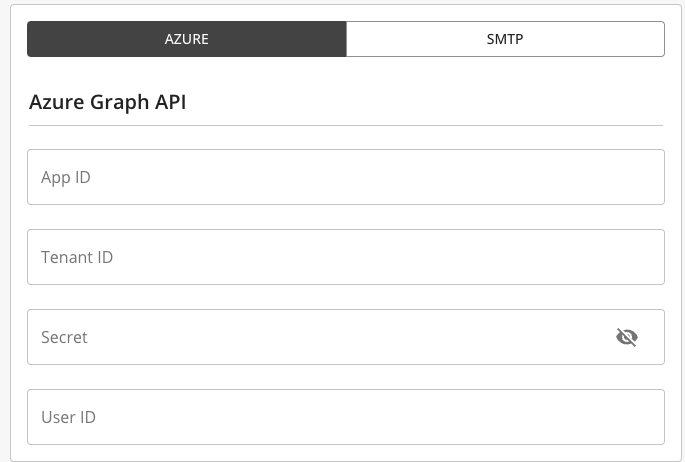
- Finally, you need to Save the configuration.
App Functions
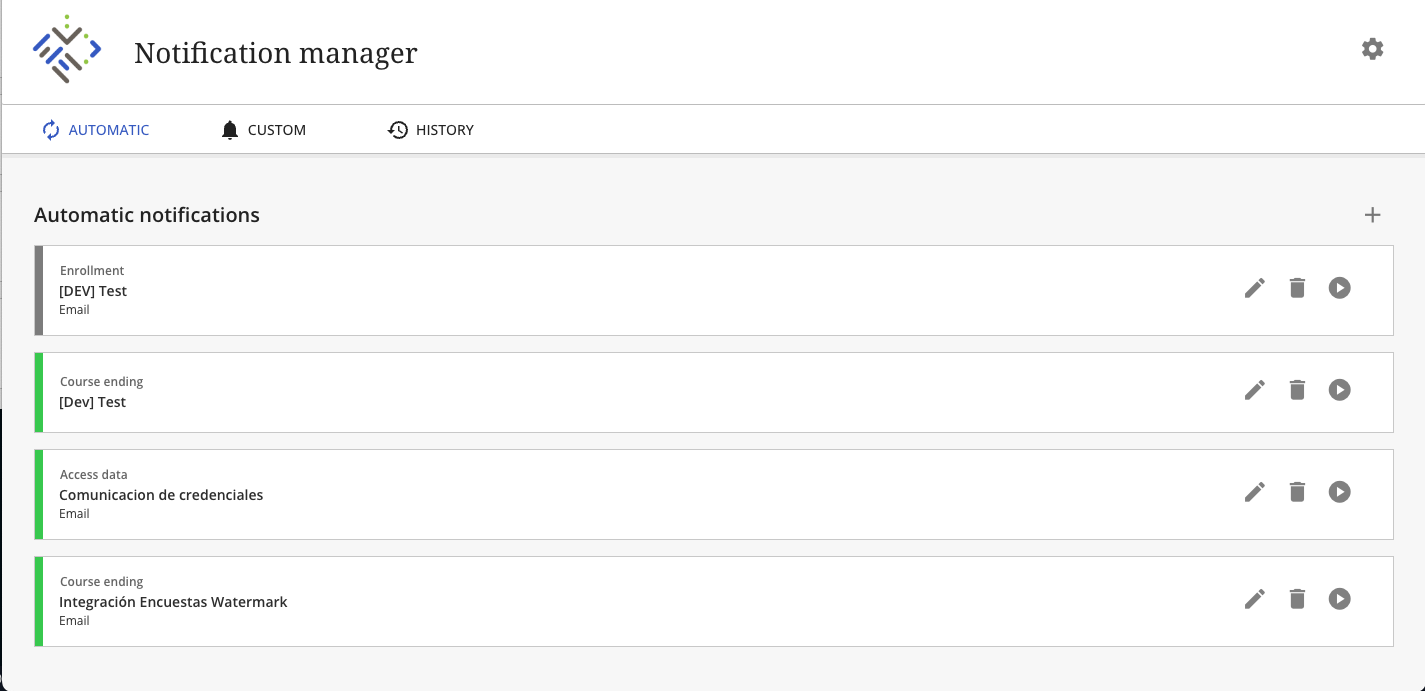
From the main page of the app, you can create automatic notifications, custom notifications, and review the notification history.

Automatic Notifications
Automatic notification processes are grouped in the first tab of the app. Active processes have a green badge, while inactive ones show a gray badge. Automatic notifications allow selecting the target audience through a series of automatic triggers.

Through the action menu of each process, you can edit the notification, delete the notification, or execute the process manually.
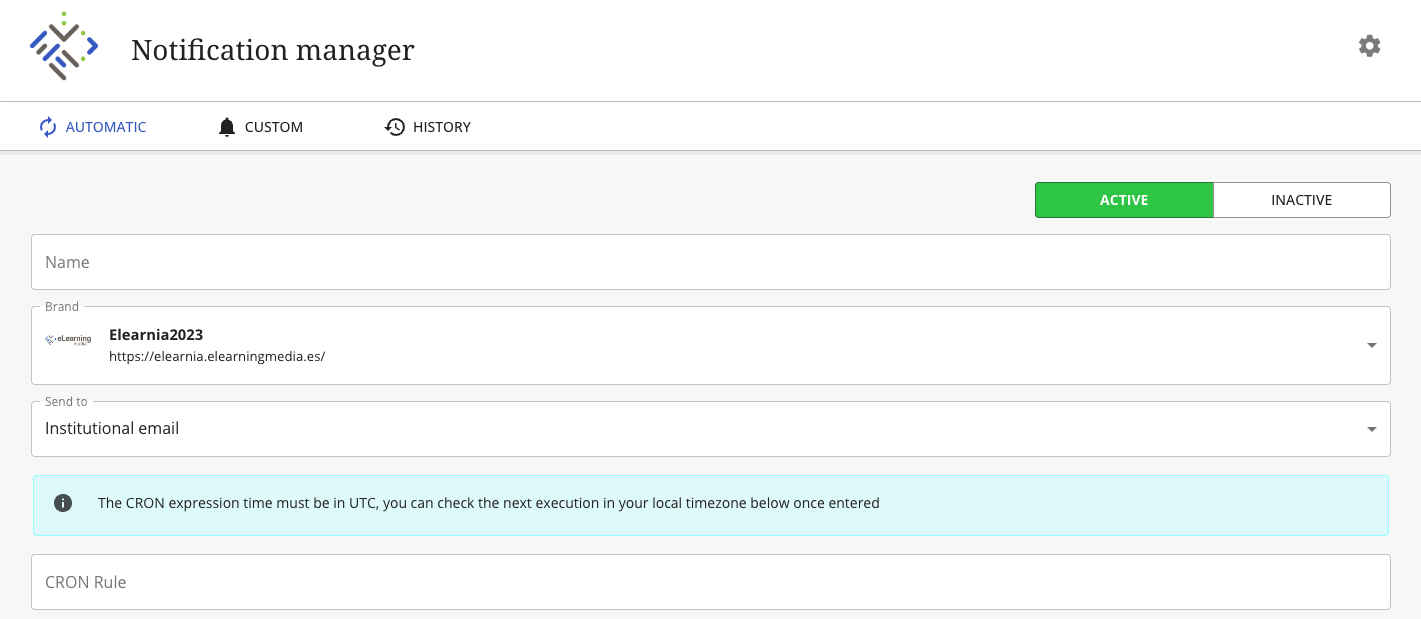
To create a new notification process, click on the + button, which will take you to the configuration screen where you need to enter the following information:
-
Name. The name of the process to identify it.
-
Brand. Allows selecting the brand image from which the notifications will be sent.
-
Email. Allows sending notifications to either the personal email or the institutional email registered for the student on the platform.
-
CRON Scheduling. CRON scheduling allows defining when the process will be executed. It can be defined directly or using the visual editor.

-
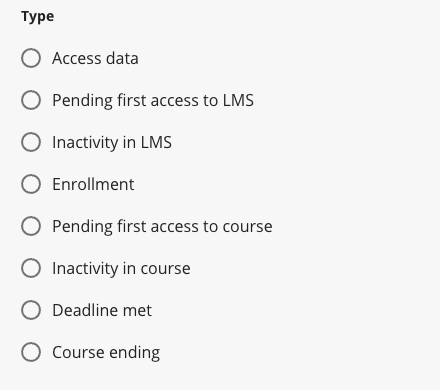
Process Trigger Selection. The different options for launching notification processes are explained in the next section.
-
Filters. When selecting each trigger, different filters are activated that allow fine-tuning the segmentation of the notification's target audience.
-
Email and SMS Activation. The following selectors allow activating email and SMS sending. Once activated, the editor with options for writing the messages will be activated.
- Message Writing. Once the selector is activated, you can access the WYSIWYG editor to write the message. It is divided between the subject and the content. Both have a series of template variables available that will be rendered with the correct information for the user when sending the notification.
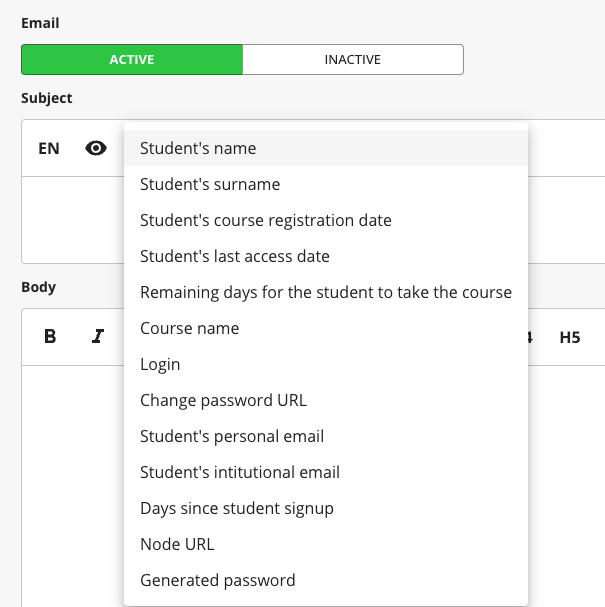
Once these details are configured, click the save button to create the process.
Trigger Explanation
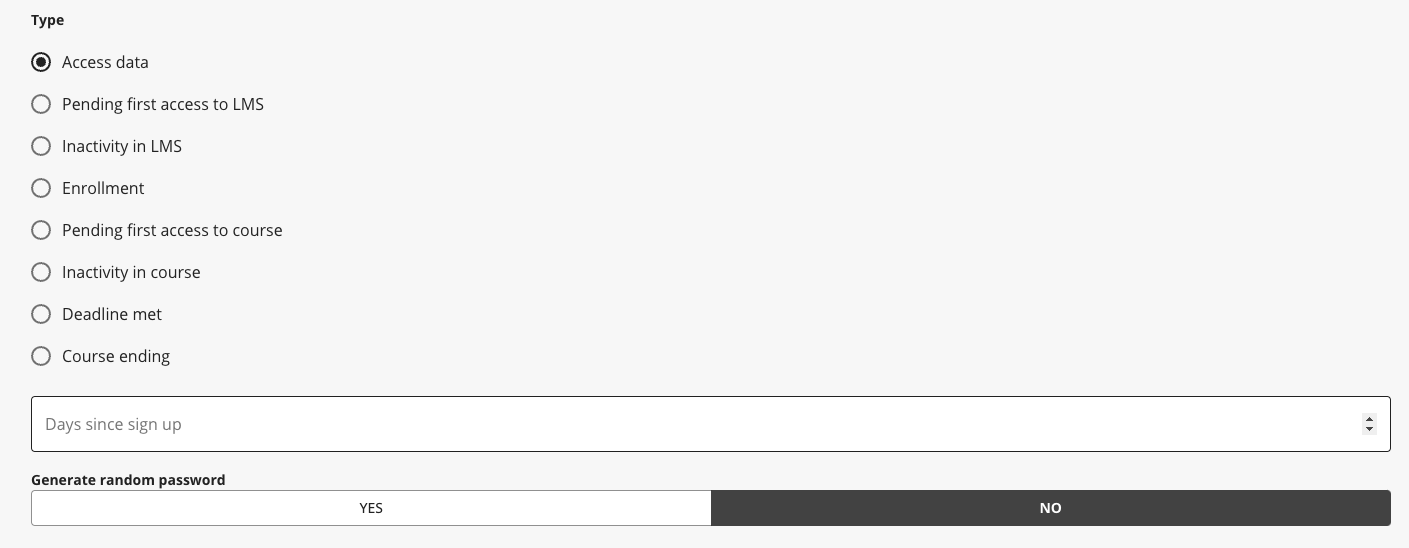
- Access Data. This trigger is used to communicate to users their access data to the Blackboard Learn platform. You must select the number of days since registration and mark whether to send an automatically generated password during the send.
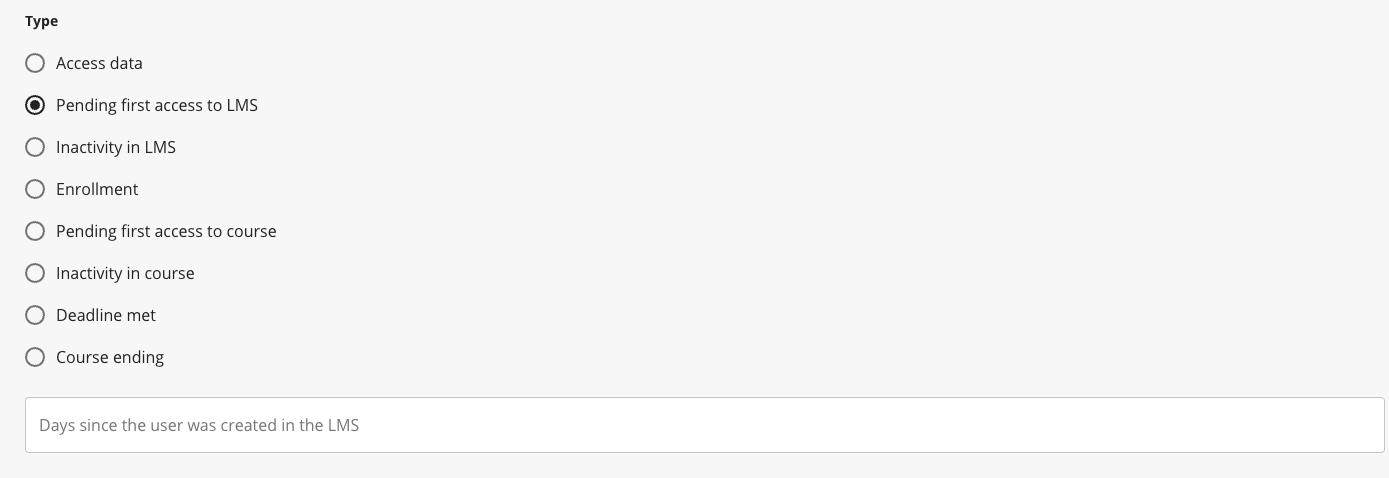
- Lack of First Access. This trigger is used to send a notification to users who have not made their first access to the platform since their registration. You must select the number of days since registration in the LMS.
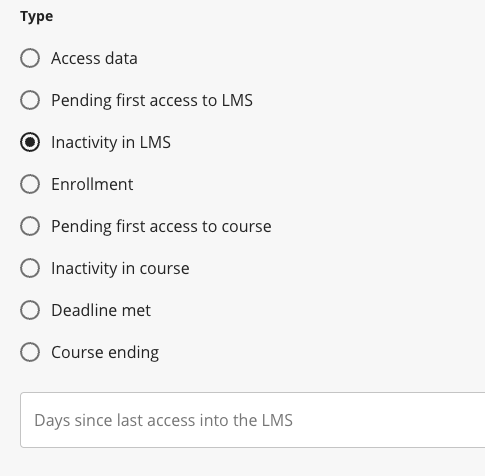
- No Access Warning in N Days to the LMS. This trigger is used to send a notification to users who have not accessed the LMS in n days. You must select the number of days since the last access.
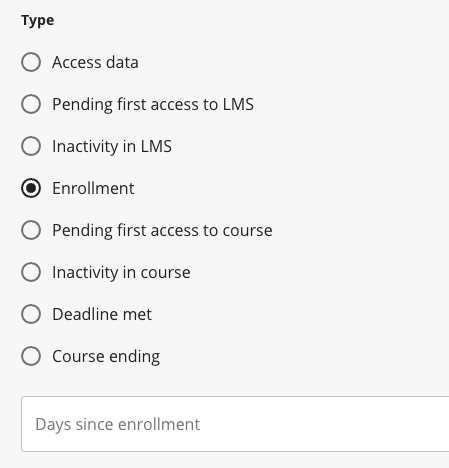
- Enrollment. This trigger is used to send a notification to users about their enrollment in courses. You must select the number of days since enrollment.
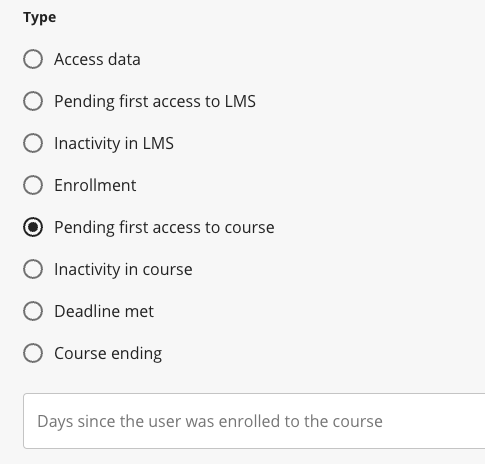
- Lack of First Access to the Course. This trigger is used to send a notification to users who have not accessed the course they are enrolled in. You must select the number of days since registration in the course.
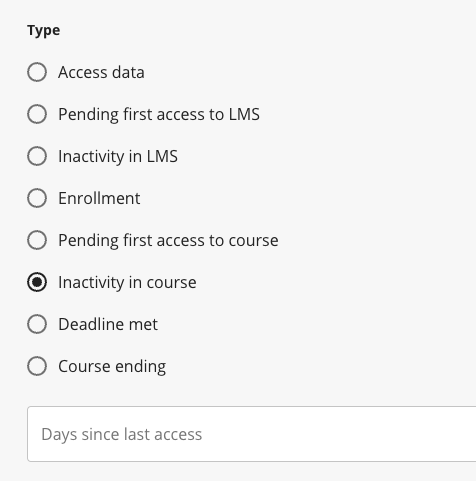
- No Access Warning in N Days to the Course. This trigger is used to send a notification to users who have not accessed the course in n days. You must select the number of days since the last access to the course.
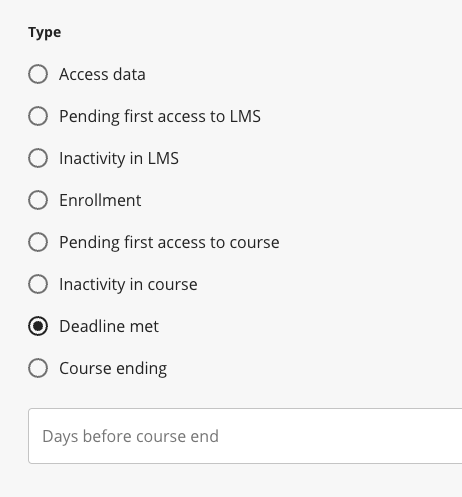
- Deadline. This trigger is used to send a notification at the end of the course completion period. You need to indicate the number of days before the course ends.
- Course/Certificate Completion. This trigger is used to send a notification at the end of the course. The trigger allows activating the end of course notification as well as activating the user's registration in Watermark's EvaluationKit. To do this, you need to move the selector and choose one of the available evaluation projects from the dropdown. Finally, you need to choose a grade column and the minimum value in that column for course completion.

Explanation of Filters for Automatic Notifications
Once the triggers are defined, you can configure a series of filters that further refine the notification's target audience.

The available filters are:
- Node in the Institutional Hierarchy. This allows notifications to be sent only to users belonging to an institutional node.

- Course. This allows notifications to be sent only to users belonging to a course existing in the system.
- Institutional Role. This allows notifications to be sent only to users belonging to an institutional role existing in the system.
- Term. This allows notifications to be sent only to users enrolled in a course belonging to a term.
- Course Role. This allows notifications to be sent only to users with a course role existing in the system.
- Enrollment Status. This allows notifications to be sent only to users with a specific enrollment status.
Custom Notifications

Automatic notification processes are grouped in the first tab of the app. Active processes have a green badge, while inactive ones show a gray badge.
Custom notifications differ from automatic ones in that it is not necessary to select triggers for launching the notification process. Instead, you only need to configure the filters to adequately refine the target audience.
Similarly, these notifications are sent manually and do not have a CRON configuration.
To create a custom notification, click the + icon at the top right of the screen.

Once done, you will fill in the following fields:
- Process Name to distinguish it.
- Brand. Allows selecting from which configured brand in the app the notifications will be sent.
- Email. Allows choosing between sending notifications to the personal or institutional email, as configured in Blackboard Learn.
- Filters. Allows refining the audience for the notification by choosing between User Context Filters and Course Context Filters which are explained in the following sections.
- Email or SMS Selection which allows accessing the message composition to be sent.
- Save
User Context Filters
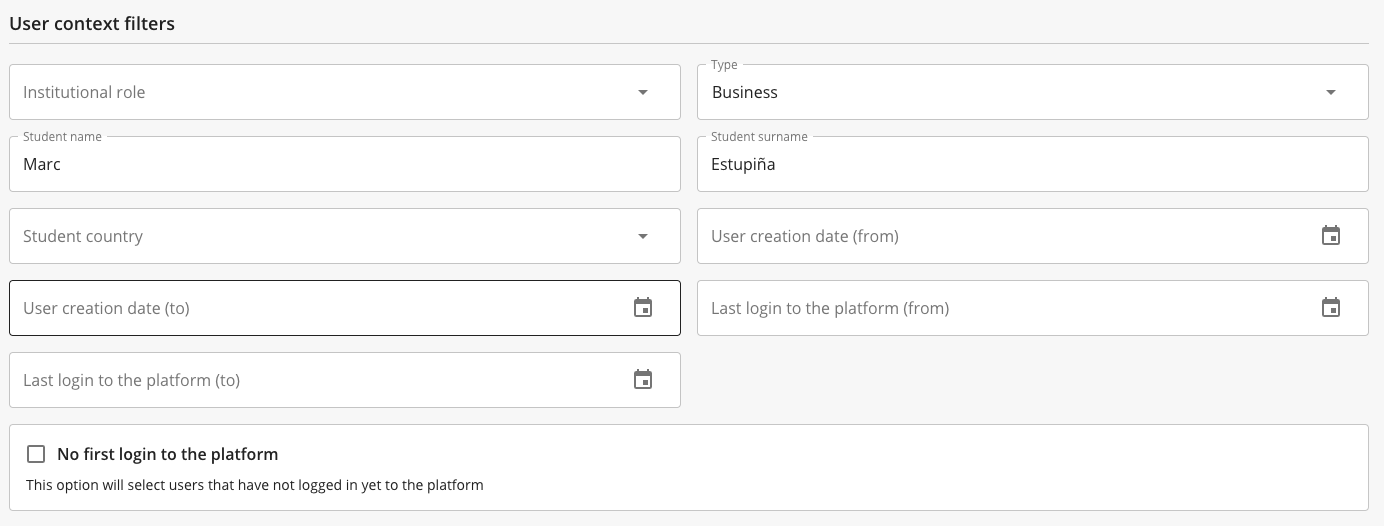
User context filters are used to narrow down the audience of custom notifications based on different user characteristics. These filters are:
- Institutional Role. Allows notifications to be sent only to users belonging to an institutional role existing in the system.
- Type. Allows distinguishing between individual or company users (this configuration must be present in Blackboard Learn).
- First and Last Name. Allows selecting an individual user by their first and last name.
- Country. Allows selecting a user by country (this configuration must be present in Blackboard Learn).
- User Creation Date. Allows selecting users created within a date range (from/to).
- Last Login. Allows selecting users who last logged into the platform within a date range (from/to).
- No Last Access Date to the Platform. Checking this option will select users who have not made a first access to the platform.
Course Context Filters
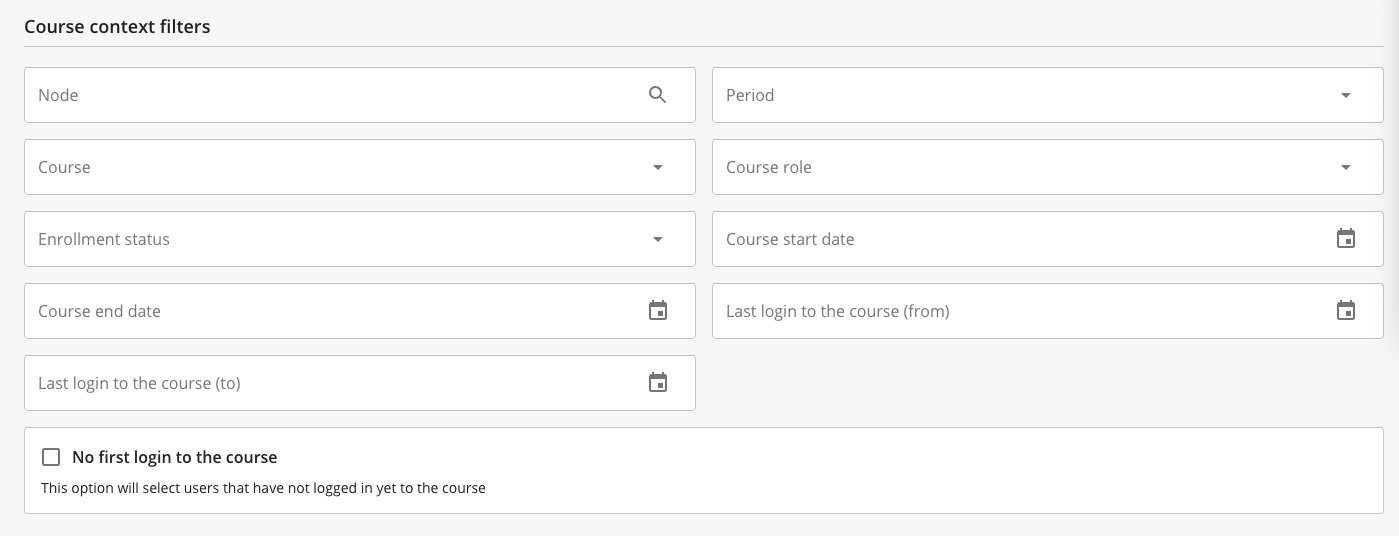
Course context filters are used to narrow down the audience of custom notifications based on different characteristics of the course they belong to. These filters are:
- Node in the Institutional Hierarchy. Allows notifications to be sent only to users belonging to an institutional node.
- Course. Allows notifications to be sent only to users belonging to a course existing in the system.
- Term. Allows notifications to be sent only to users enrolled in a course belonging to a term.
- Course Role. Allows notifications to be sent only to users with a course role existing in the system.
- Enrollment Status. Allows notifications to be sent only to users with a specific enrollment status.
- Course Start and End Dates. Allows defining a date range for the start and end of courses.
- Last Access Date to the Course. Allows selecting a last access date to the course.
- No Last Access Date to the Course. Checking this option will select users who have not made a first access to the course.
Notification History
You can access the notification history from the third tab on the main page of the app.
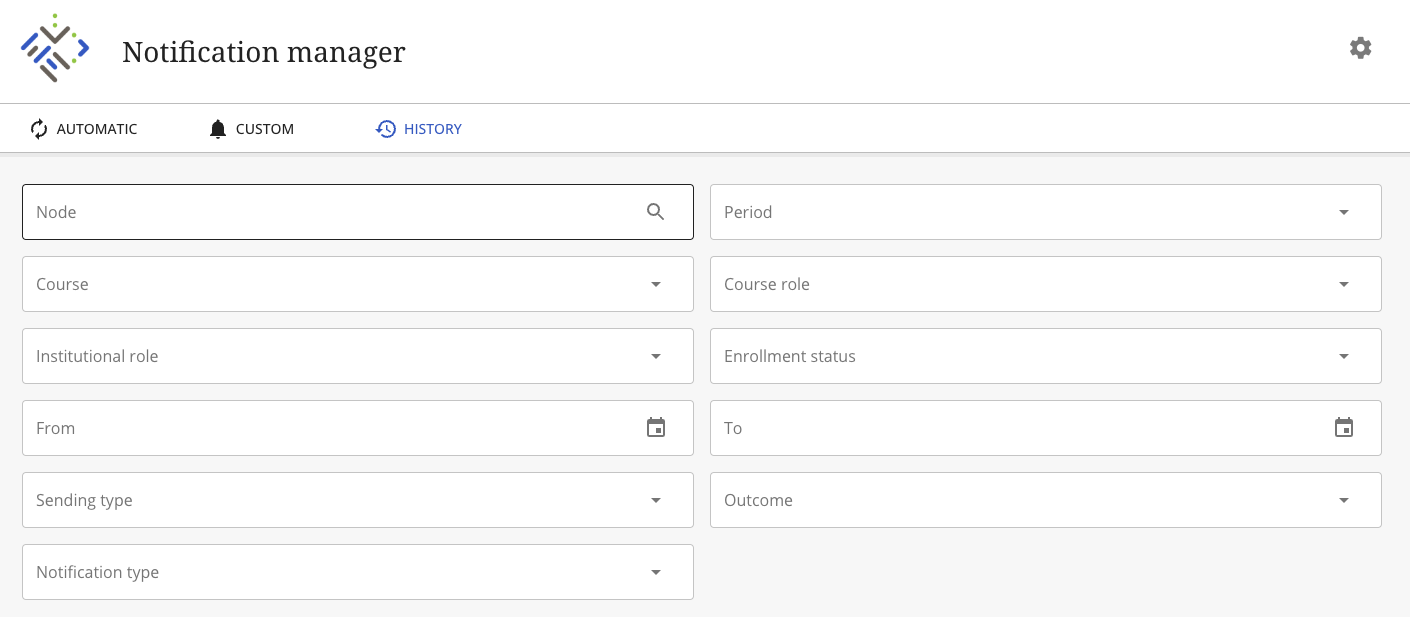
Due to the volume of processes and notifications, this interface presents a series of filters that allow refining the notification history for a specific audience. The included filters are:
- Node in the Institutional Hierarchy. This allows notifications to be sent only to users belonging to an institutional node.
- Course. This allows notifications to be sent only to users belonging to a course existing in the system.
- Institutional Role. This allows notifications to be sent only to users belonging to an institutional role existing in the system.
- Term. This allows notifications to be sent only to users enrolled in a course belonging to a term.
- Course Role. This allows notifications to be sent only to users with a course role existing in the system.
- Enrollment Status. This allows notifications to be sent only to users with a specific enrollment status.
- Dates (from/to). This allows defining a date range for the notification history.
- Sending Type. This allows choosing email and SMS sendings.
- Result. This allows distinguishing between sent and failed.
- Notification Type. This allows choosing between different types of automatic or custom notifications.
Finally, once the desired filters are selected, click the Generate CSV button which creates a file with the following fields:
- ID
- Sending Type
- Notification ID
- Notification Name
- Notification Type
- User
- Institutional Email
- Personal Email
- Phone
- Sent
- Error
- Node IDs
- Term ID
- Course ID
- Course Role ID
- Institutional Role ID
- Status
- Retries
Help us improve! Do you have any suggestions or improvements for this documentation? Write to us!